
How to Edit a Floor Plan Without Starting Over
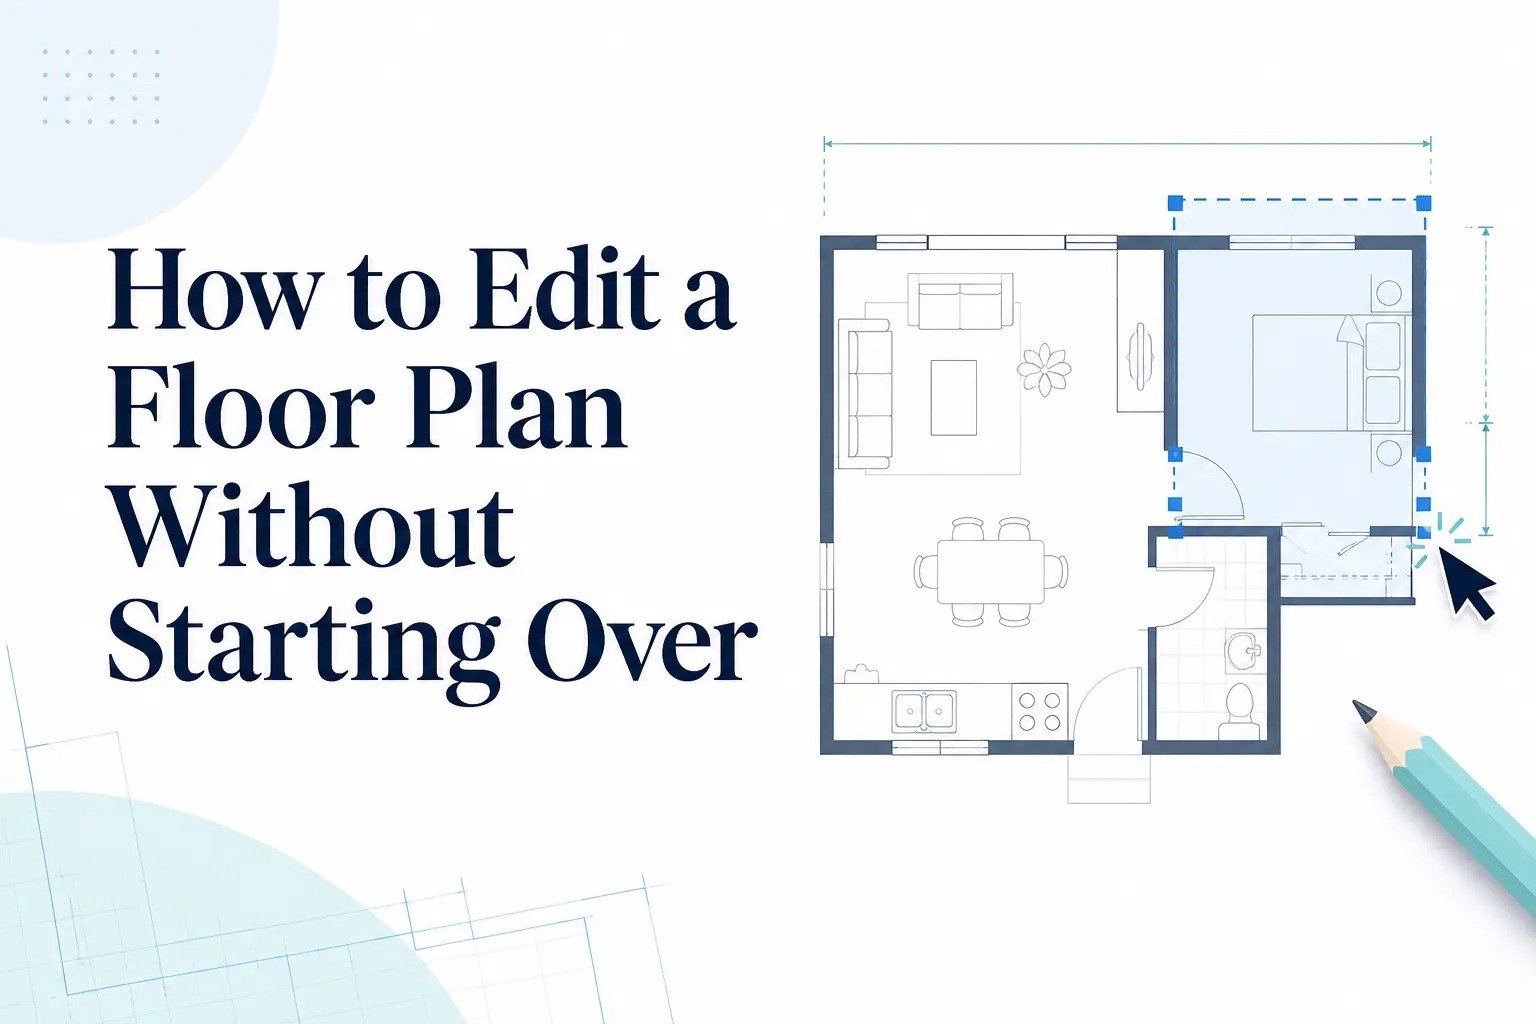
You’re looking at your floor plan for the third time, and one thing keeps bothering you: the bedroom is just a little too small. You move a wall, then realize the hallway no longer works. You fix that, and suddenly the furniture doesn't fit the way you wanted.
This is where editing a floor plan can get frustrating. The change itself may be simple, but making it work across the rest of the layout is another story. And if you're working with a traditional floor planning workflow, even a small change can mean more work than you might expect.
So why does such a small change often turn into so much extra work?
Why Editing an Existing Floor Plan Can Be Difficult
If you have an editable project, professional tools such as AutoCAD or Revit give you precise control over walls, dimensions, and other elements. But if you just want to make a few changes to an existing plan, the process can still be more work than you'd expect.
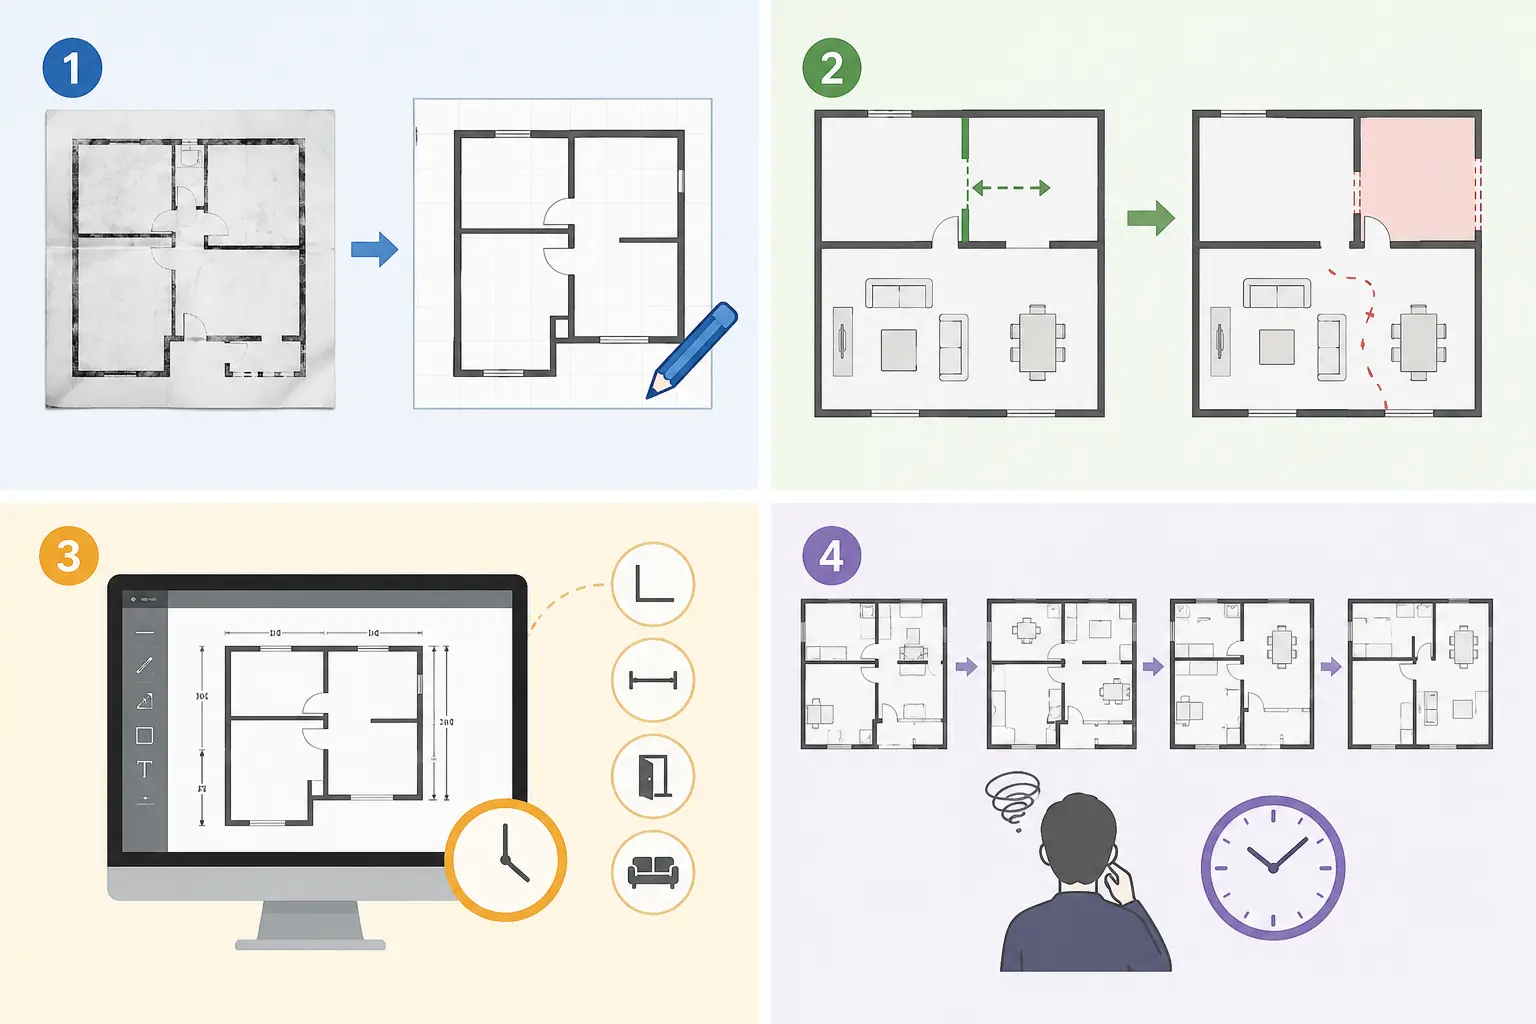
You May Need to Redraw the Plan First
If your floor plan is only a JPG, PNG, or scanned image, you can't simply select a wall and move it. You may need to recreate or trace the layout before you can start editing.
One Small Change Can Affect the Rest
Move a wall, and the size of another room may change. Add a door, and you may need to rethink the furniture or circulation. A small edit can quickly lead to several more adjustments.
The Tools Take Time to Learn
CAD and floor planning software give you plenty of control, but you still need to learn how to draw walls, set dimensions, place objects, and make precise adjustments.
Revisions Add Up
You may want to try three or four different layouts before deciding which one works best. If you want to test several versions, all that redrawing and adjusting can quickly eat up your time.
So what if you could start with the floor plan image you already have and make the changes directly, instead of rebuilding it first?
A New Way to Edit a Floor Plan From an Image
Instead of recreating your floor plan from scratch, you can now start with the image you already have. AI can interpret the existing layout and let you describe the changes you want to make, so the original plan becomes a starting point rather than something you have to rebuild.
With the Editor tool in Floor Plan Maker, you can use a free online floor plan editor to make these changes. The process is simple:
- Upload your floor plan
- Brush over or draw a box around the area you want to change
- Describe what you want to change
- Refine the result
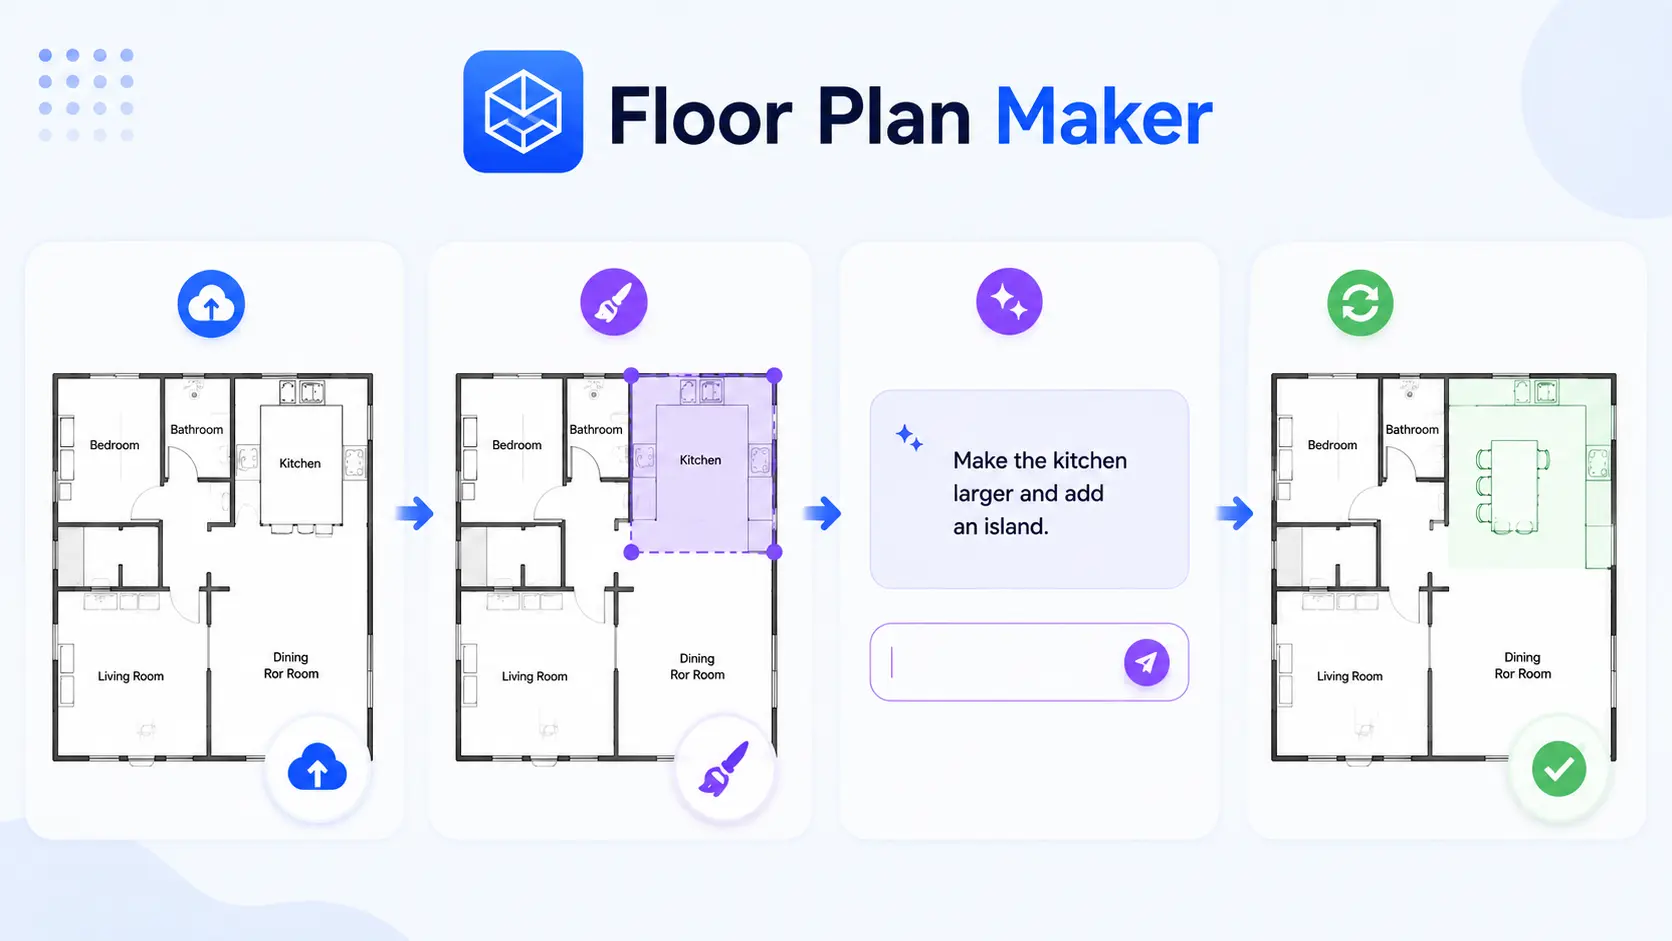
You can start with a JPG, PNG, screenshot, or other image-based floor plan, then use prompts to make changes while keeping the original layout as a reference.
The goal isn't to redesign everything. It's to keep what already works and change only what needs to be different.
So, what does that look like in practice? Let's look at four common floor plan changes and how you can make them.
4 Common Floor Plan Changes You Can Make
Once you have an existing floor plan to work from, an AI floor plan editor can help you make more than minor changes. You might be trying to make better use of a tight layout, combine two spaces, add something that's missing, or simply see how a different furniture arrangement would work.
Here are four situations you may run into when editing an existing floor plan.
🏠Resize or Reconfigure Rooms
Sometimes the room itself isn't the problem—you just need to use the space differently. For example, you might remove the cabinets along one side of the kitchen and replace them with an island, or turn an underused bedroom into a home office.
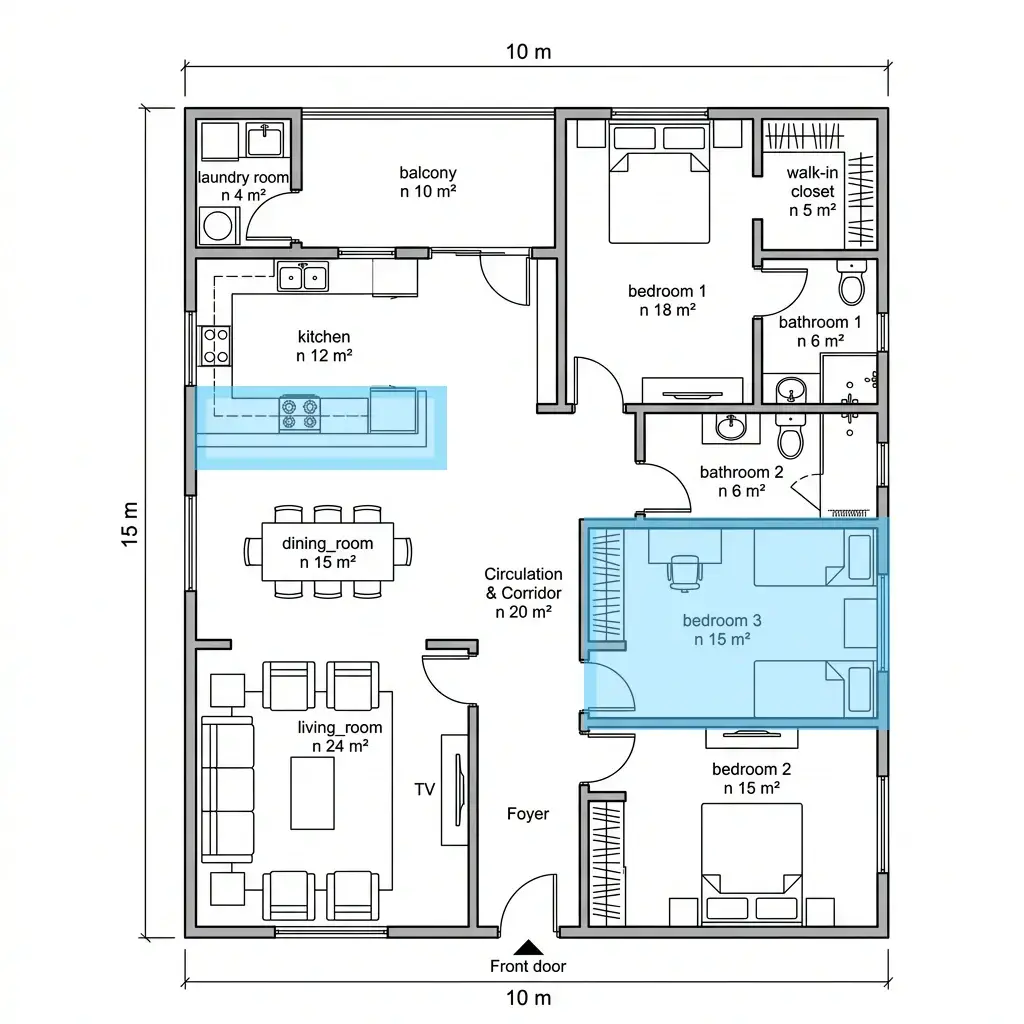
Convert bedroom 3 into a study, and replace the kitchen area facing the dining room with an island.
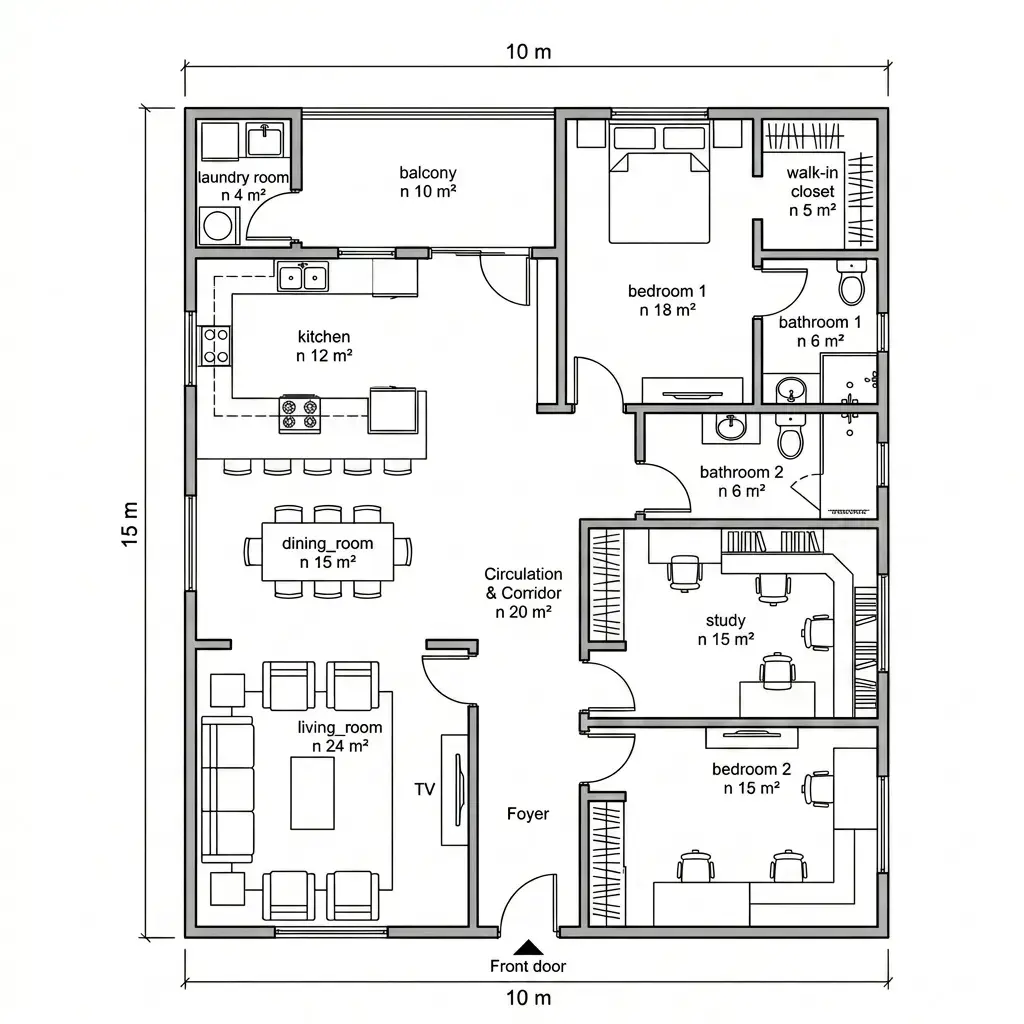
With an existing floor plan, you can make these changes without rebuilding the entire layout. Simply mark the area you want to change and describe the new arrangement you have in mind.
🧱 Merge Adjacent Spaces by Moving or Removing Walls
Two small rooms don't always need to stay separate. In this example, the storage room and laundry room are combined into a single space by removing the wall between them, creating a more open and practical layout.
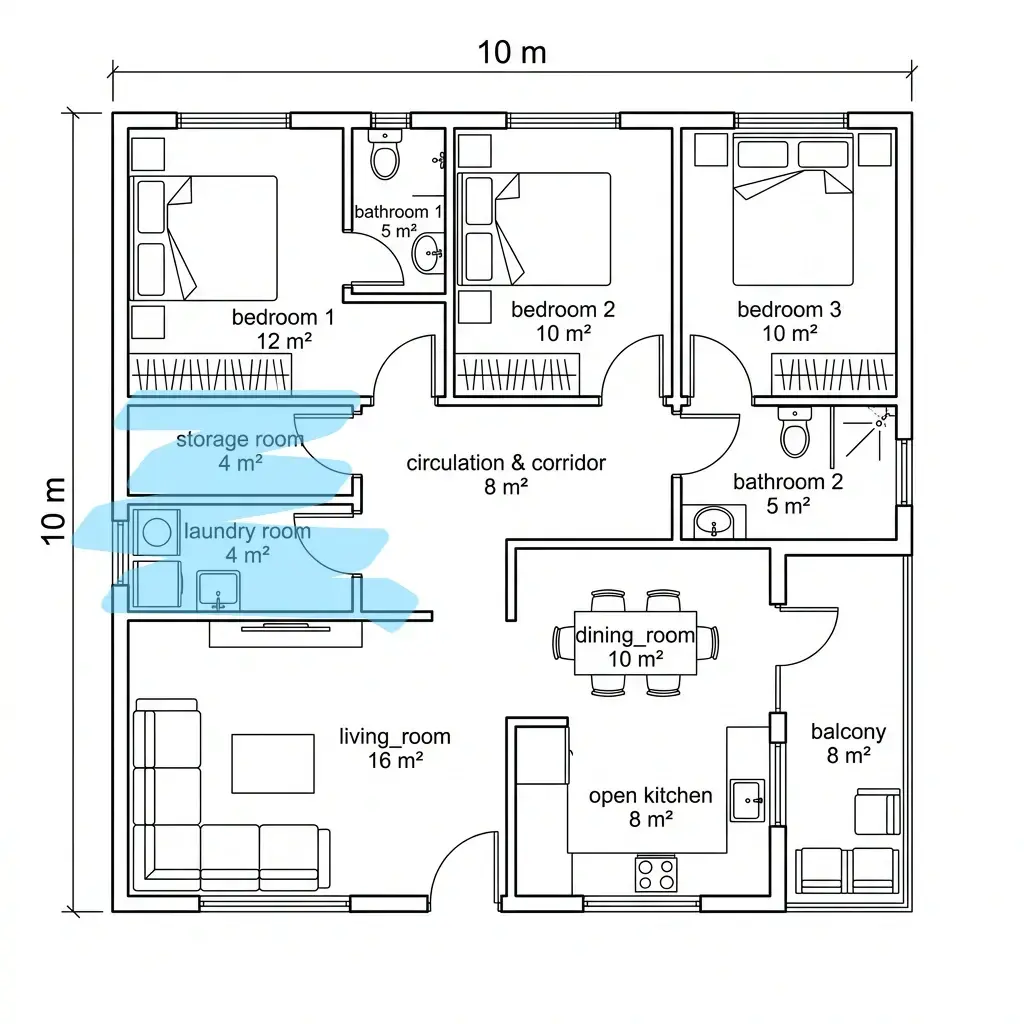
Combined the storage room and laundry room into one functional space.
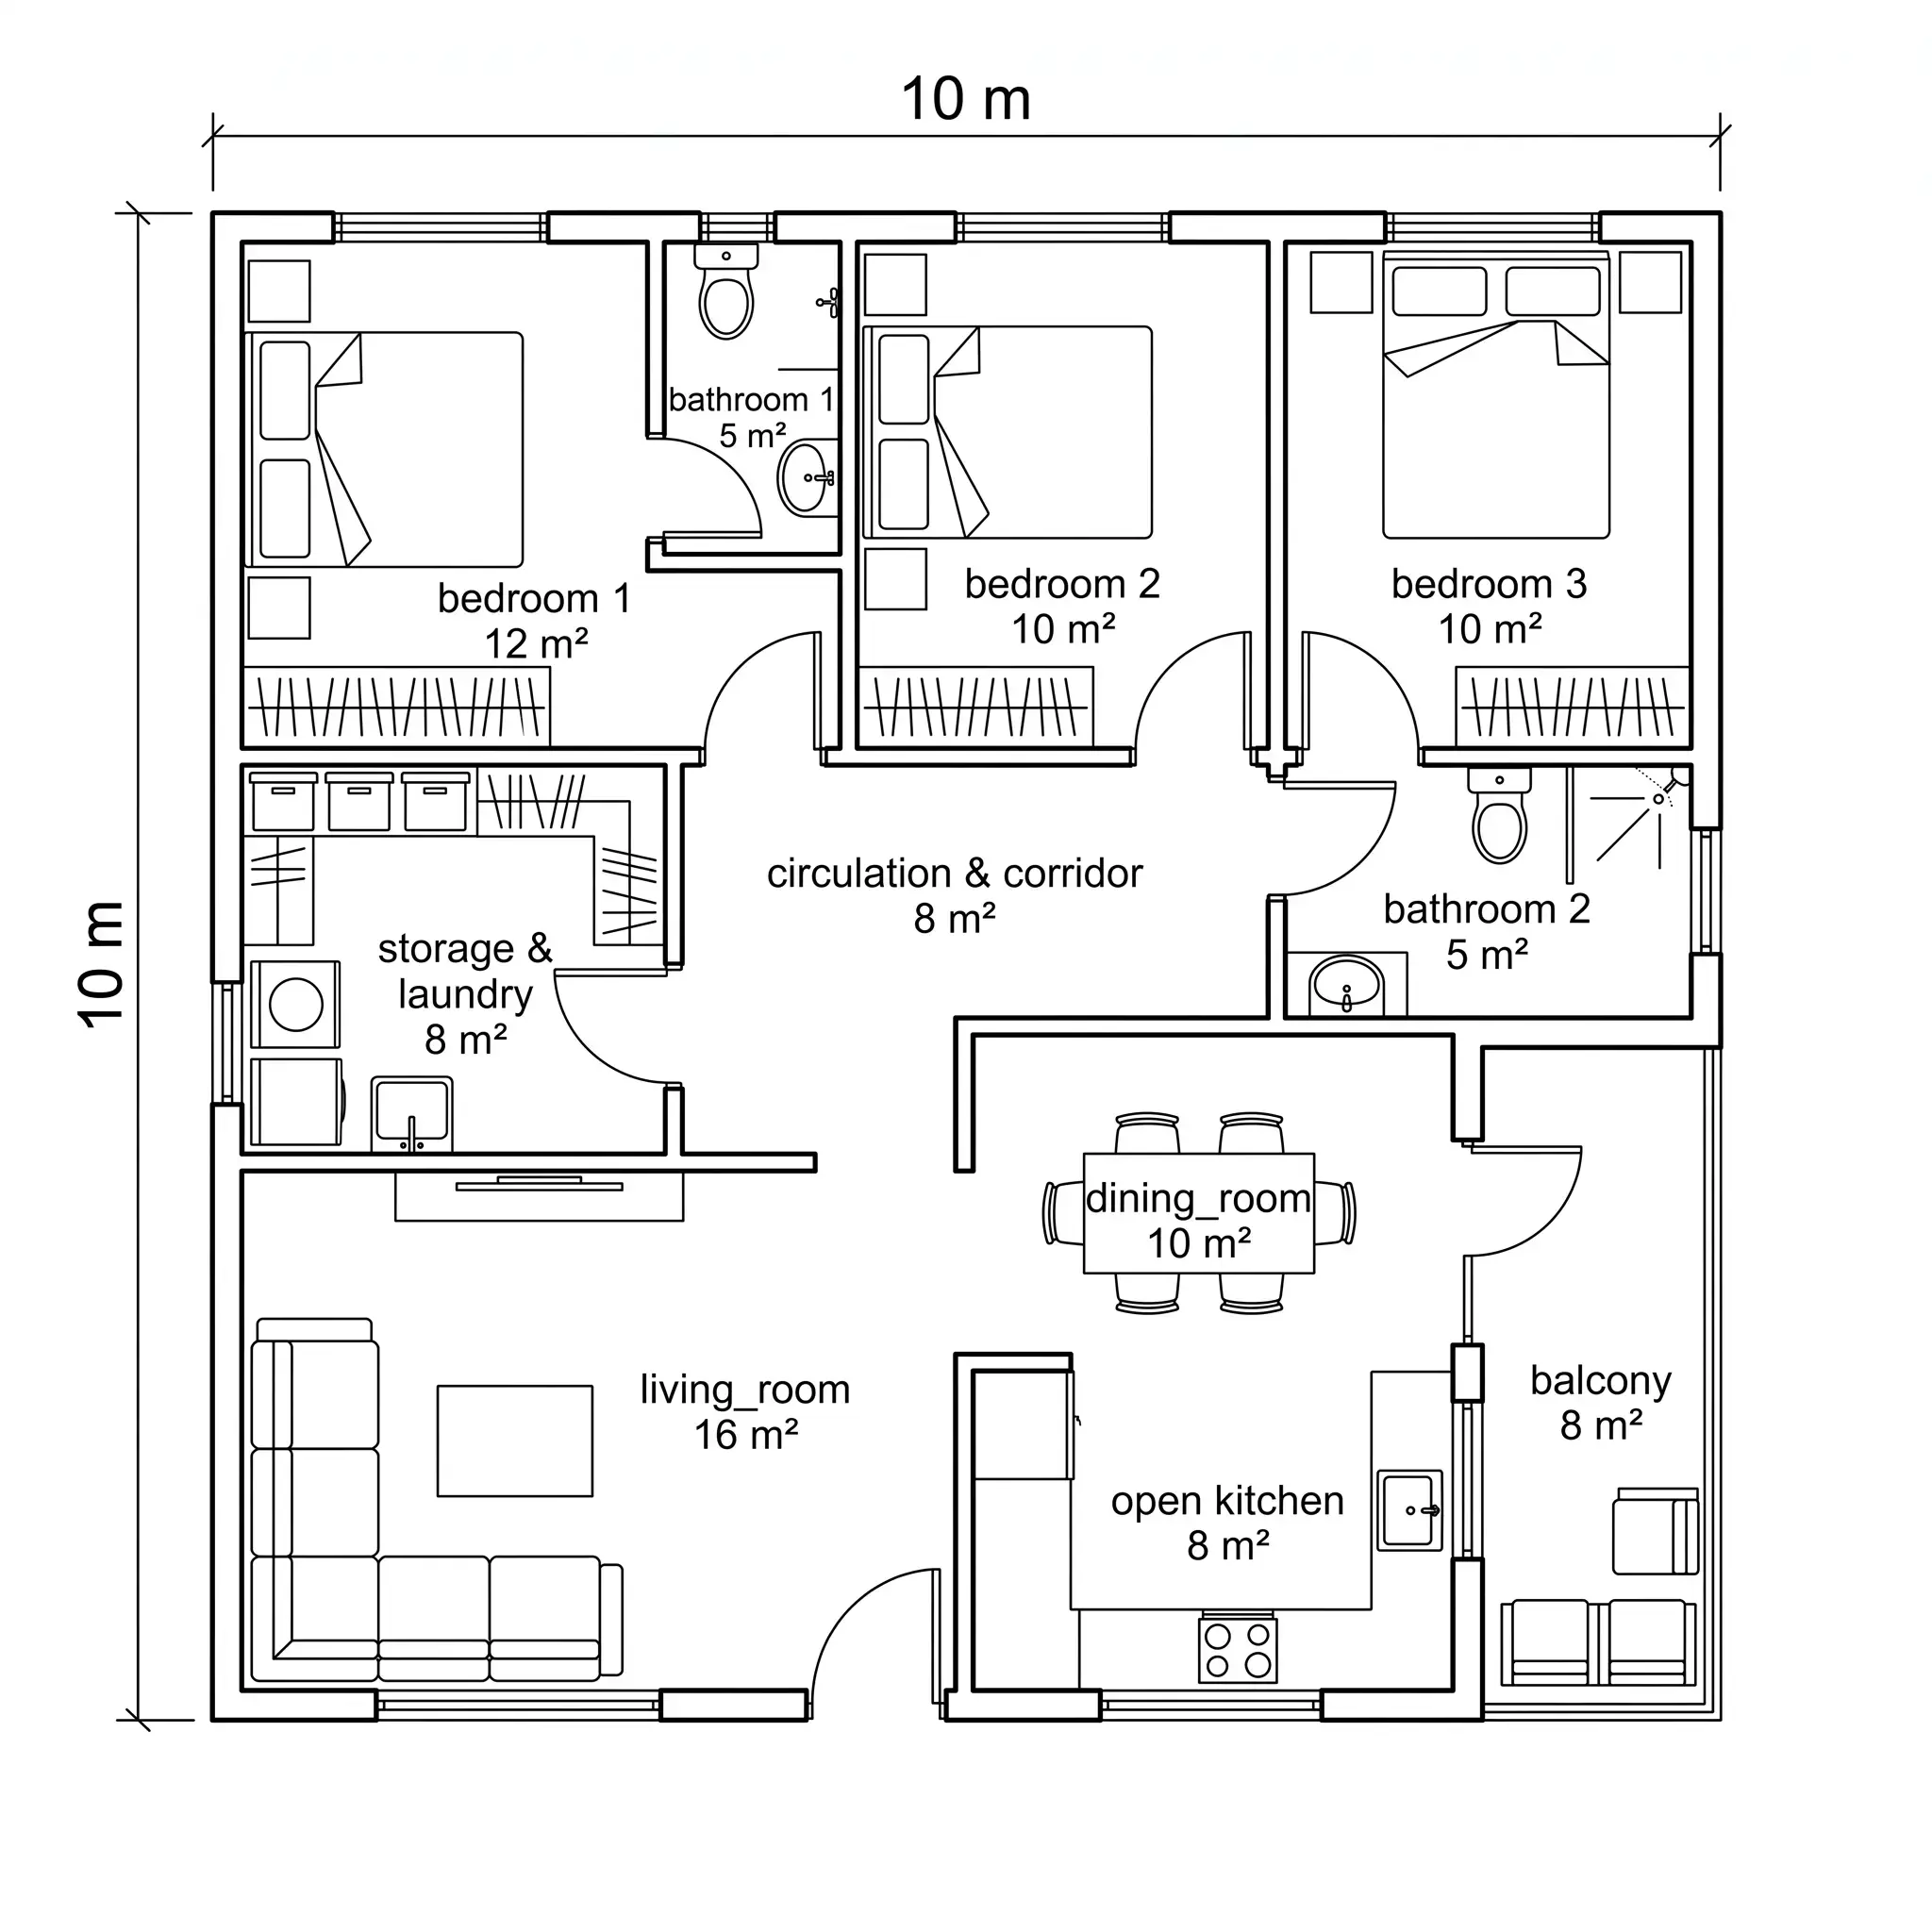
With an existing floor plan, you can mark the wall and describe the change you want to make, without having to redraw the surrounding rooms.
🌿 Add a New Room or Space
Need more space without starting over with the entire plan? In this example, the garage is extended to create additional usable space, while a garden is added to the front yard.
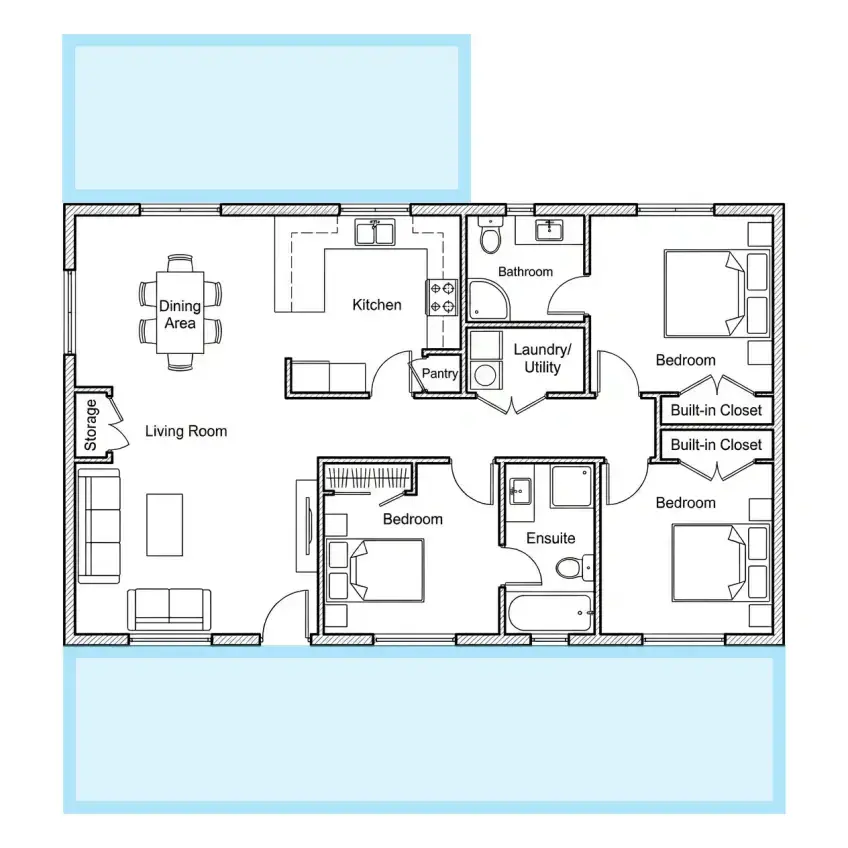
Create a garage area by opening the restaurant wall, including a garage door for vehicle access, a clearly marked parking space, a workspace, and a tool wall. Add a front yard garden area next to the main entrance.
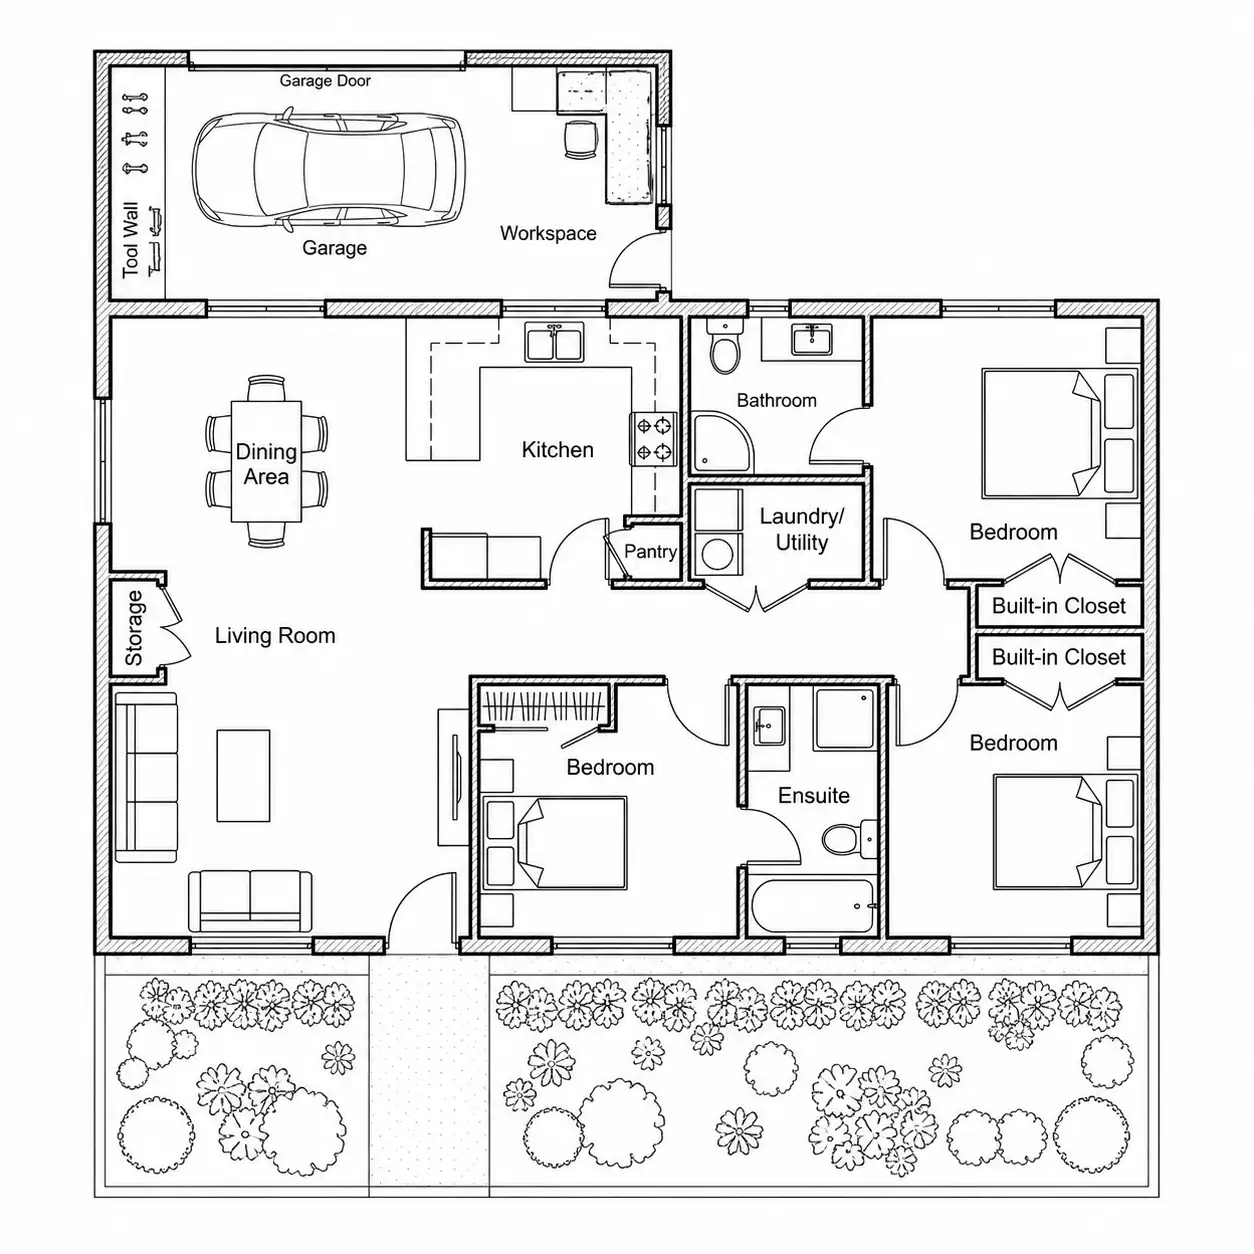
With the original floor plan as a starting point, you can mark where the new space should go and describe the changes you want to make. The rest of the layout can stay as it is.
🛋️ Rearrange Furniture in an Individual Room
A room can have the right size and still not feel quite right once the furniture is in place. In this example, the furniture layout of a single room is changed to make better use of the available space and improve the flow around the room.
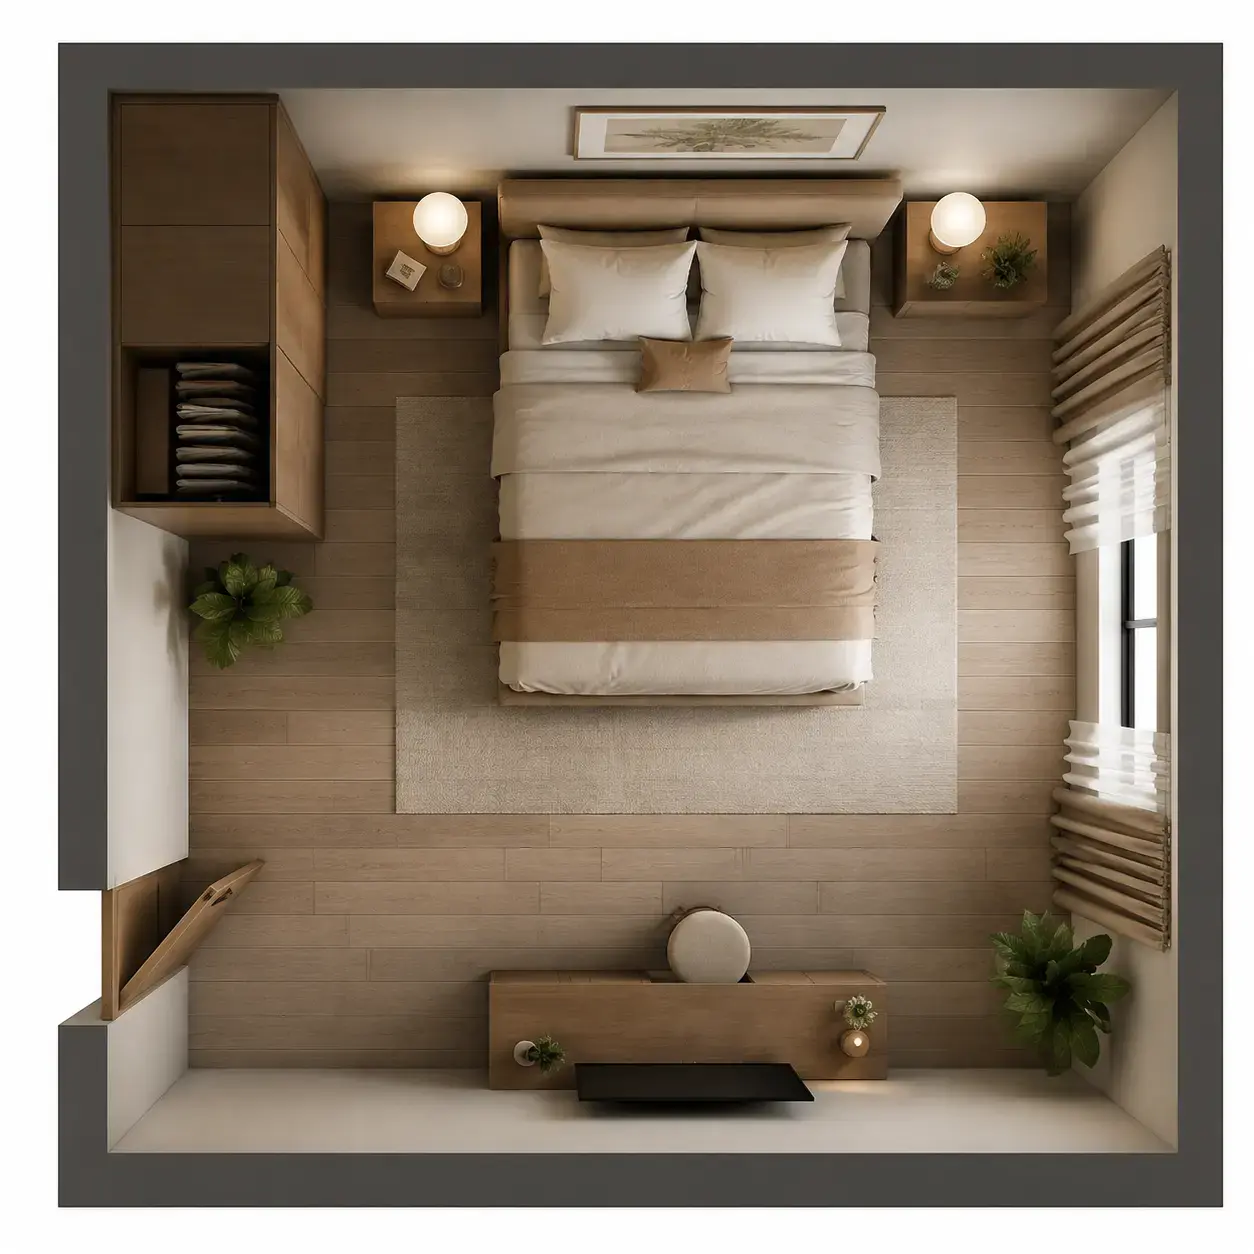
The wall opposite the bed was placed with a big wardrobe, keep the door position, an L-shaped dressing table was placed on the left side of the bed, and the bedside table on the right was converted into a reading area including a single sofa and a small bookcase.
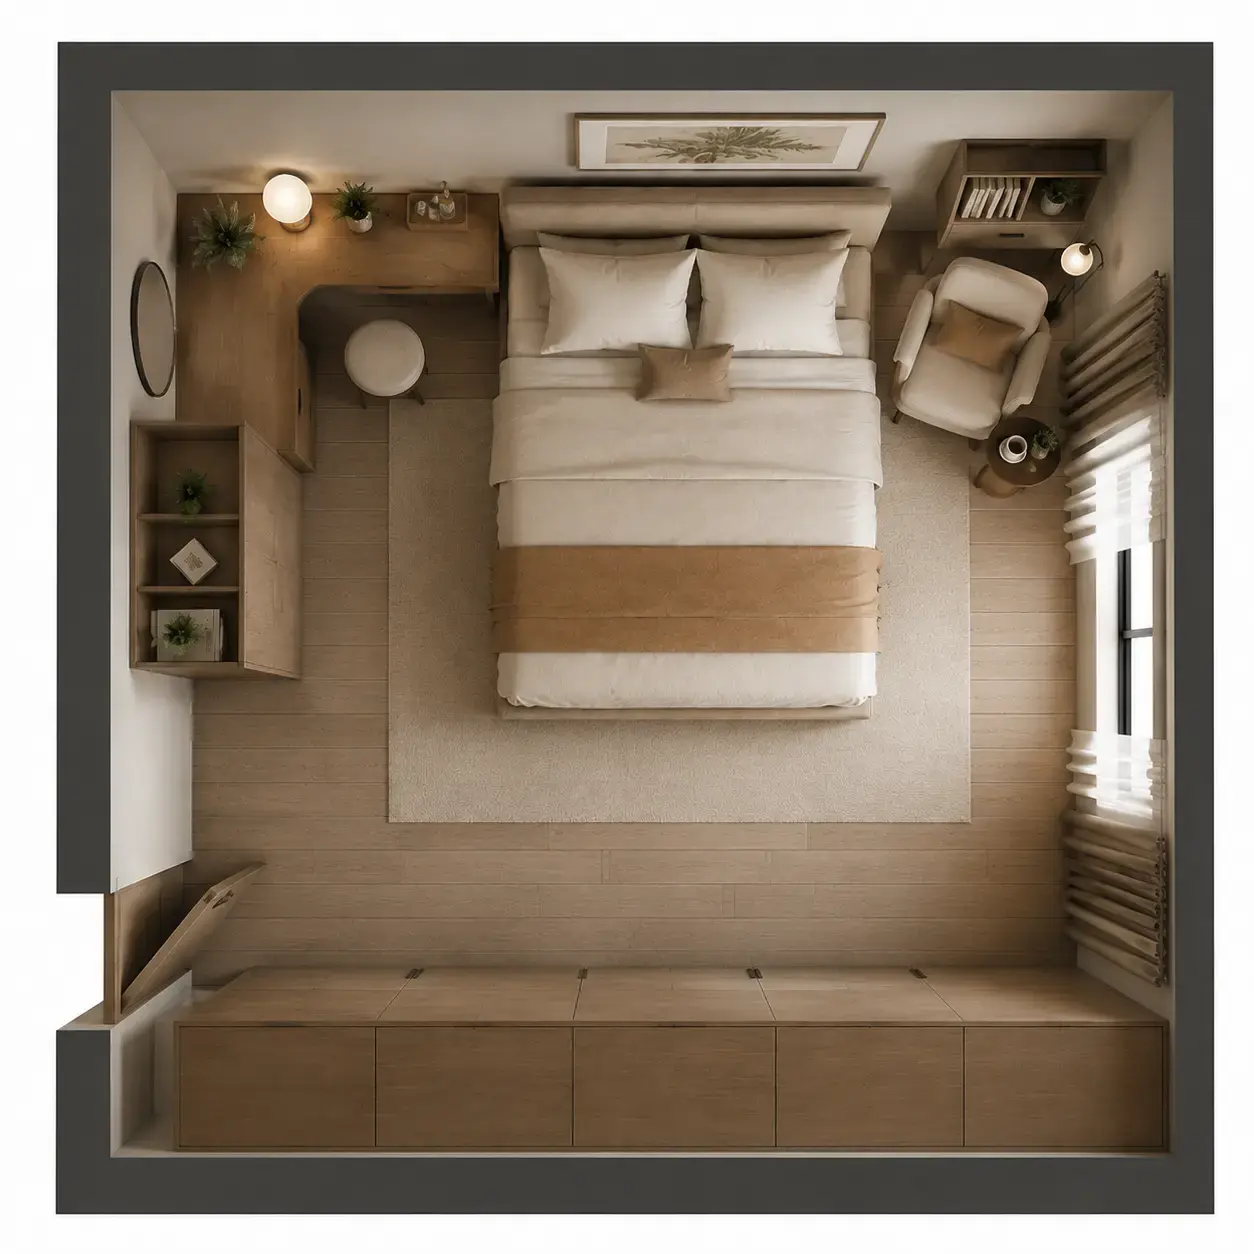
You can select just the room you want to adjust and describe how you want the furniture rearranged, while leaving the rest of the floor plan unchanged.
What to Check After Editing Your Floor Plan
Before using or sharing your edited floor plan, take a quick look at:
| Check | What to Look For |
|---|---|
| Room dimensions | Are the updated rooms the intended size? |
| Wall connections | Do the walls connect properly without gaps or overlaps? |
| Doors and windows | Are their positions still practical with the new layout? |
| Furniture clearance | Is there enough space around furniture and openings? |
| Circulation | Can people move comfortably between rooms and around furniture? |
| Overall proportions | Does the updated layout still look balanced and make sense as a whole? |
For planning and visualization, an AI-edited floor plan can be a useful starting point. For structural changes or construction, however, the final plan should be reviewed by a qualified professional.
Conclusion
Editing a floor plan doesn't always have to mean starting over. Whether you're resizing a room, removing a wall, adding new space, or rearranging furniture, working from the plan you already have can make the process much easier. The key is to change what needs to be changed while keeping the parts of the layout that already work.
The examples in this guide all use an existing floor plan image as the starting point. If that's what you have, you can try it with the Floor Plan Maker Editor:
Floor Plan Editor From ImageIf you have a different type of floor plan file, you can also import it into our Floor Plan Creator for further editing. For more advanced drafting or construction-related work, professional CAD or architectural software may be a better fit.
Further Questions
1. Can I edit a floor plan if I only have a screenshot?
Yes. If the screenshot clearly shows the floor plan, you can use it as the starting image for editing. Clear walls, room boundaries, and other visible elements make it easier to identify and modify the layout.
2. How specific should my prompt be when editing a floor plan?
Be specific about what you want to change and where. For example, instead of saying “make the kitchen better,” describe which cabinets to remove, where to place an island, and how you want the space to function.
3. Can I continue editing an AI-generated floor plan?
Yes. After generating an edited result, you can use the Continue Editing button to make further changes based on the result image. You don't need to upload the floor plan again, so you can refine the same layout through multiple edits.
4. What should I do if the edited result isn't what I expected?
You can adjust your prompt and try again, especially if the result doesn't fully match what you had in mind. Try describing the location, layout, and specific elements more clearly to guide the next edit.
5. Do I need to select the entire floor plan if I want to change the overall layout?
No. You don't need to brush over the entire image. For an overall layout change, you can leave the selection area empty and describe the layout you want in your prompt instead. You can specify how many rooms you need, how they should be arranged, and which elements—such as a kitchen, bathroom, bedroom, or living area—you want to include.