
14 Classroom Layout Ideas for Different Learning Activities
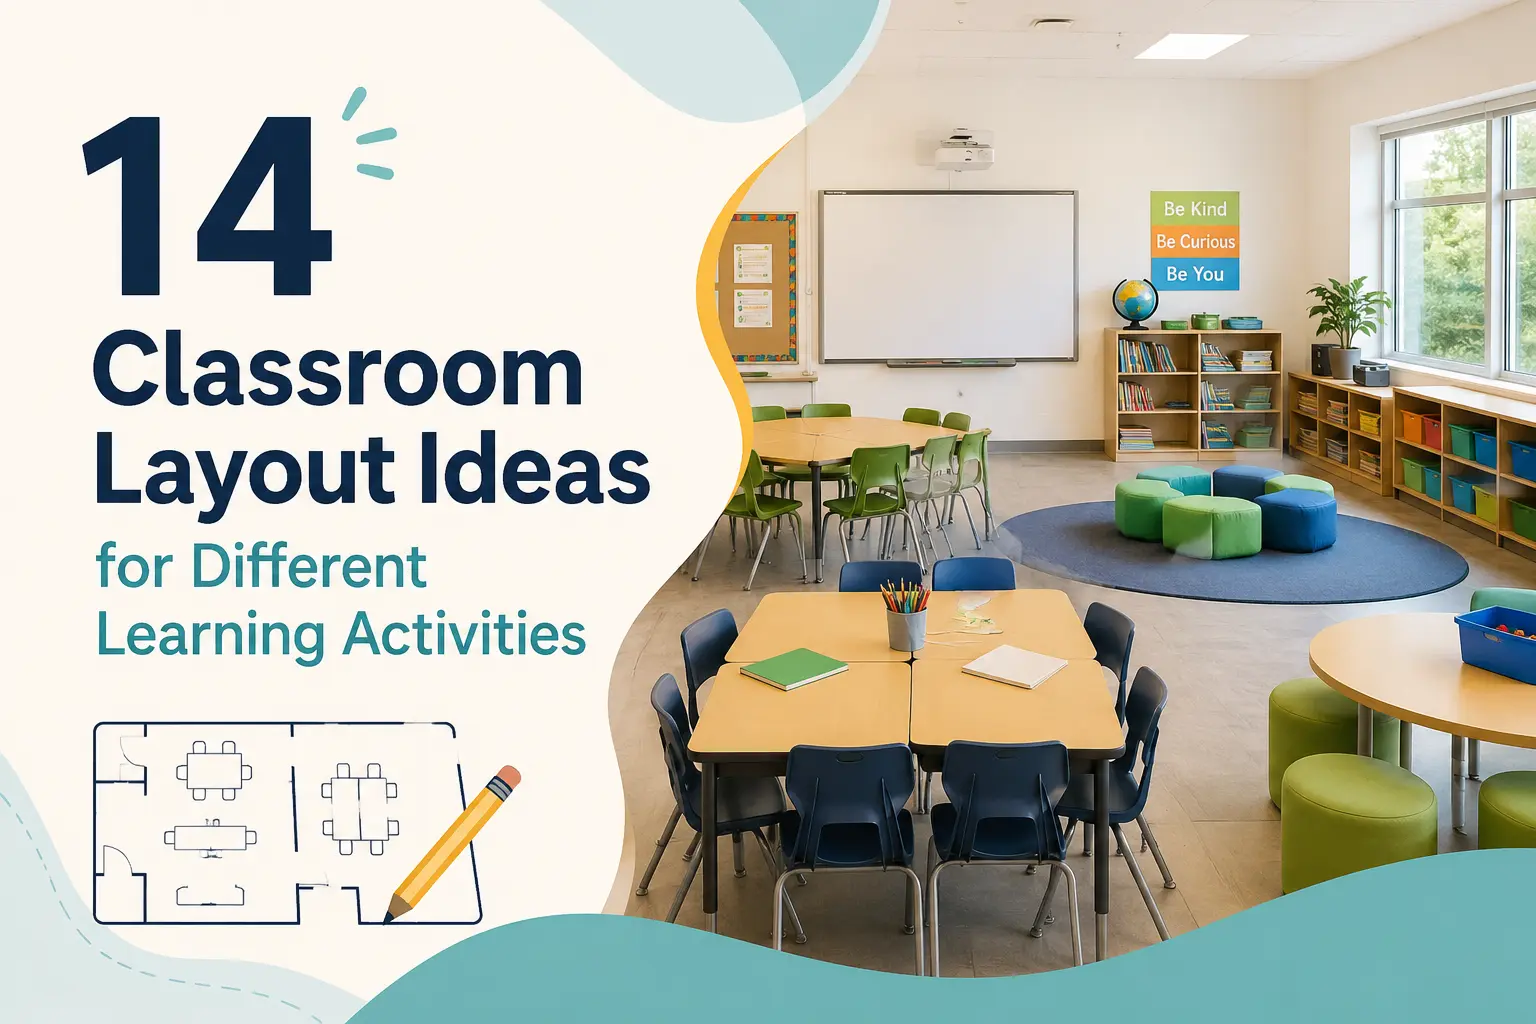
When you start planning a classroom, the hardest part is often not the size of the room. It's figuring out what to do with all that space.
Should the desks face the front? Would groups work better? Is there enough room between tables for students to move around? And if you're teaching younger children, where do you put the activity areas, storage, and open space they actually need?
There are plenty of classroom layouts to choose from, but the “best” one depends on what happens in the room every day. A row-based setup can be great for focused work, while group pods make more sense for collaboration. U-shaped layouts, flexible seating, learning stations, and Montessori setups all solve different problems.
Here are 14 classroom layout ideas to help you compare them and find one that fits your space and the way your class works.
Quick Guide: Which Classroom Layout Is Right for You?
If you don't have time to go through all 14 ideas, start here. Find the situation that sounds most like your classroom and see which layout may work best.
| Your Main Need | Recommended Layout |
|---|---|
| 🎯 Focused work & tests | Rows Classroom Layout |
| 👥 Partner activities | Pairs Classroom Layout |
| 🪑 Individual work & flexible desk placement | Individual Desks Classroom Layout |
| 🤝 Small-group collaboration | Clusters Classroom Layout |
| 💬 Whole-class discussion | U-Shaped Classroom Layout |
| 🗣️ Face-to-face discussion | Horseshoe Classroom Layout |
| 👀 Equal participation | Circle Classroom Layout |
| 🧩 Team projects & group work | Group Pods Classroom Layout |
| 🔄 Activity-based learning | Learning Stations Classroom Layout |
| 🔀 Changing activities throughout the day | Flexible Seating Classroom Layout |
| ↔️ More room for movement | Open Classroom Layout |
| 🧸 Play & activity areas for young children | Preschool Classroom Layout |
| 🍼 Care routines & early childhood activities | Nursery Classroom Layout |
| 🌱 Independent, self-directed learning | Montessori Classroom Layout |
If you want to compare the layouts visually or create your own floor plan with a free online classroom floor plan maker, keep reading.
Traditional Classroom Layouts
The way you arrange the desks can completely change the feel of a classroom. Put them in straight rows and the room feels focused. Turn a few around for partner work, or bring them together into groups, and the same room starts to work very differently.
Let's start with some of the more traditional arrangements.
Rows Classroom Layout
A rows layout keeps every desk facing the same direction, making it a practical choice when the teacher, whiteboard, or presentation is the main focus of the room. It also makes it easy to keep clear aisles between desks and fit a predictable number of students into a given space.
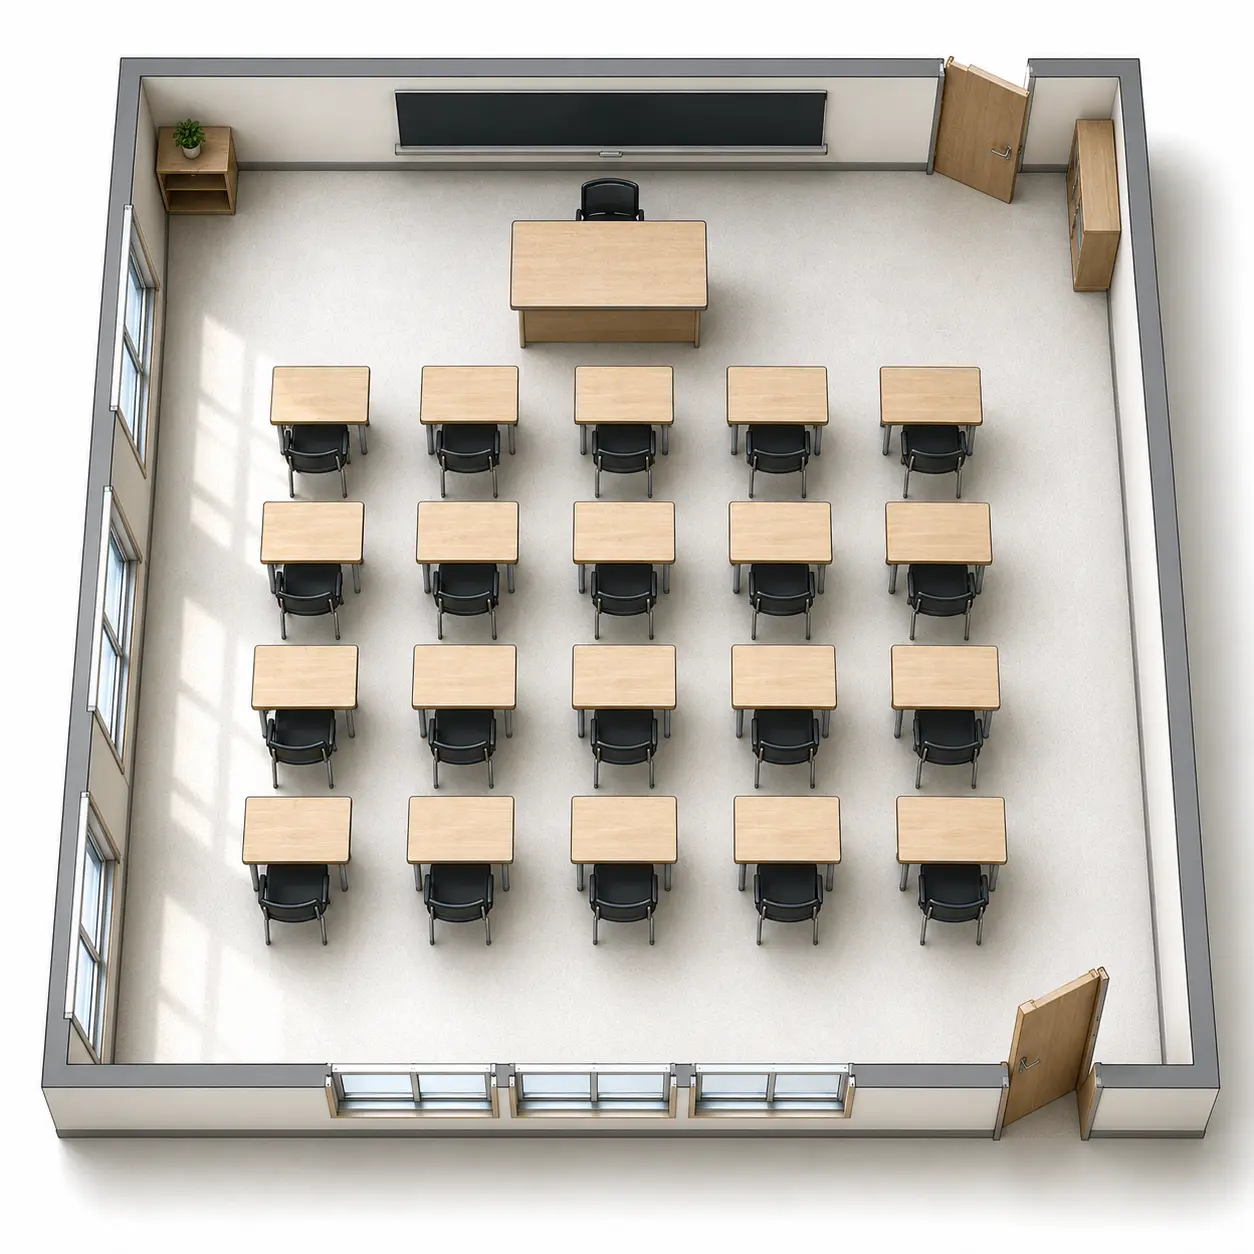
- Best for: Lectures, tests, presentations, and individual work
- Main advantage: Clear sightlines and efficient use of space
- Keep in mind: Less suitable for group discussion and collaborative activities
Pairs Classroom Layout
Putting two desks together changes the dynamic without requiring a completely different classroom setup. Students can turn to a partner, compare work, or discuss an assignment while still having their own defined workspace.
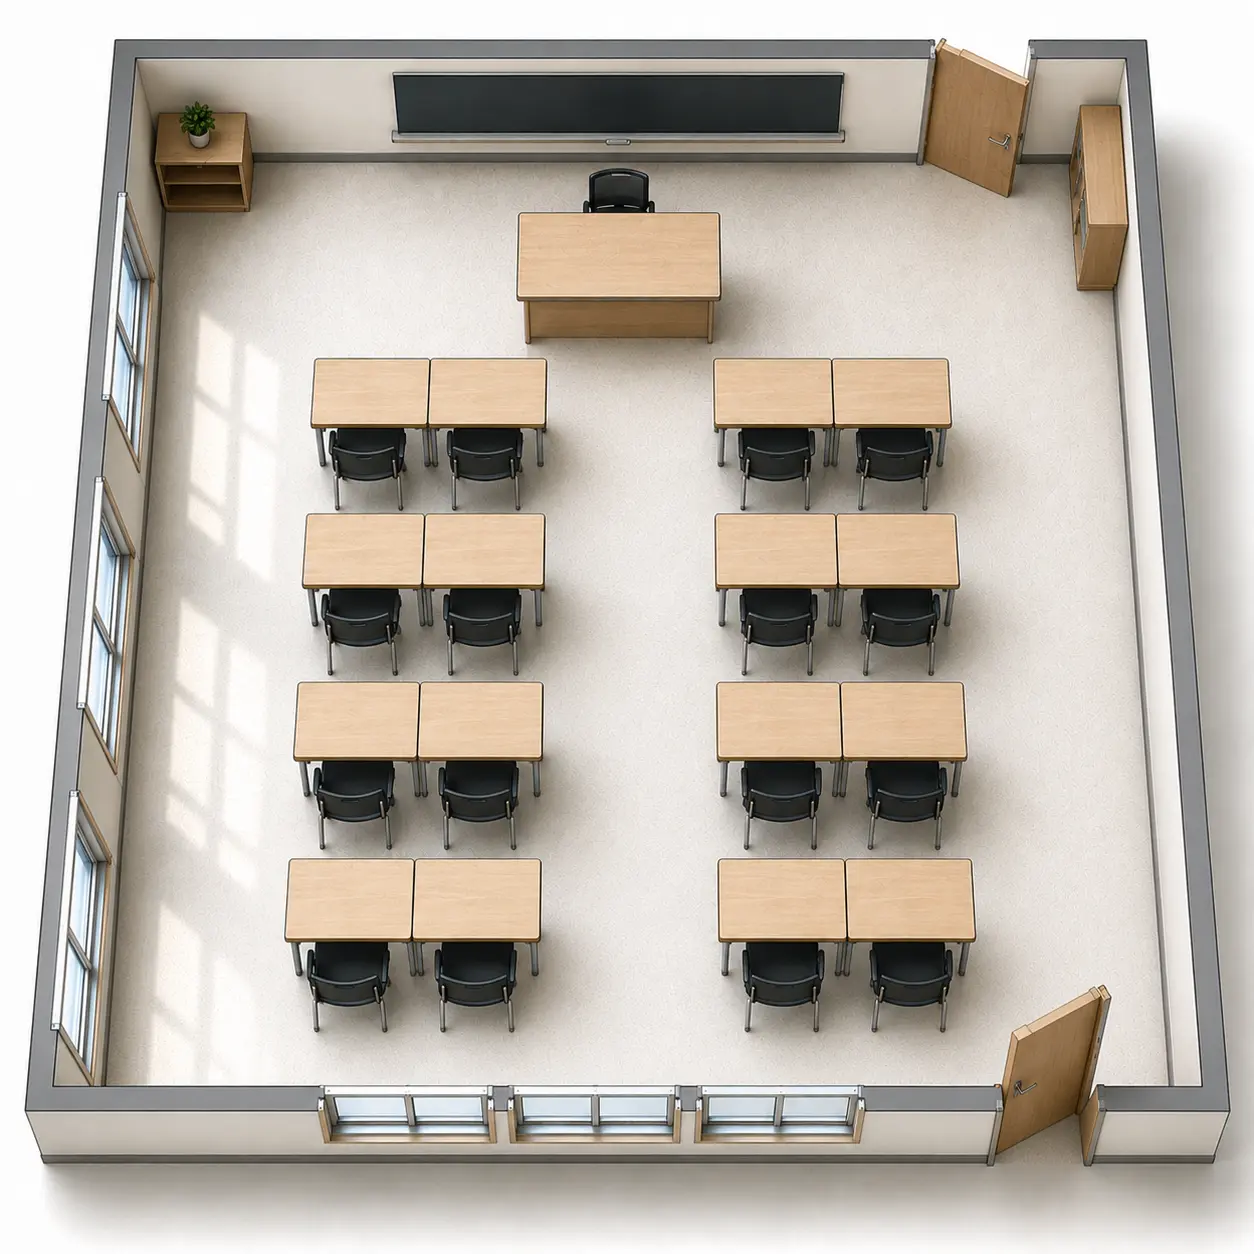
- Best for: Partner work, peer discussions, and short collaborative activities
- Main advantage: Makes two-person interaction easy
- Keep in mind: Less effective for larger group activities
Individual Desks Classroom Layout
Sometimes the simplest arrangement gives you the most room to adapt. With desks kept separate, you can space students out for a test, shift them closer for discussion, or rearrange part of the room without moving everyone.
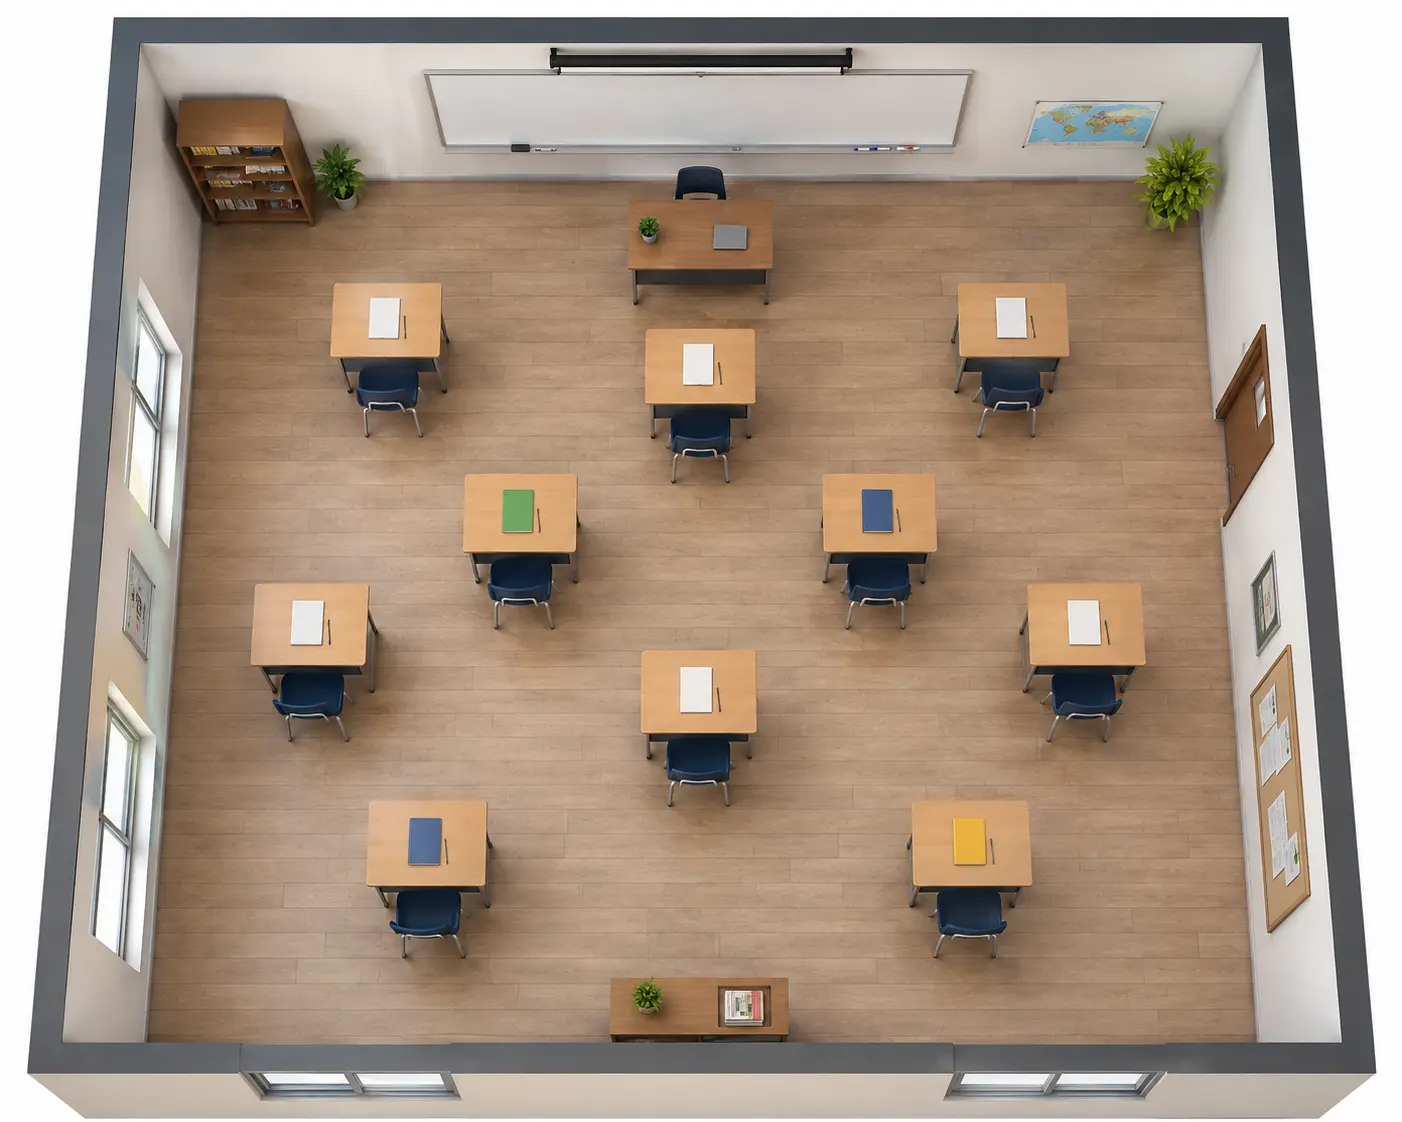
- Best for: Individual work, tests, and flexible classroom activities
- Main advantage: Easy to rearrange for different needs
- Keep in mind: Leave enough space between desks for comfortable movement
Cluster Classroom Layout
A cluster changes who students naturally face during class. Instead of looking mainly toward the front, several students share a small work area, making it easier to compare ideas, share materials, and work on a project together.
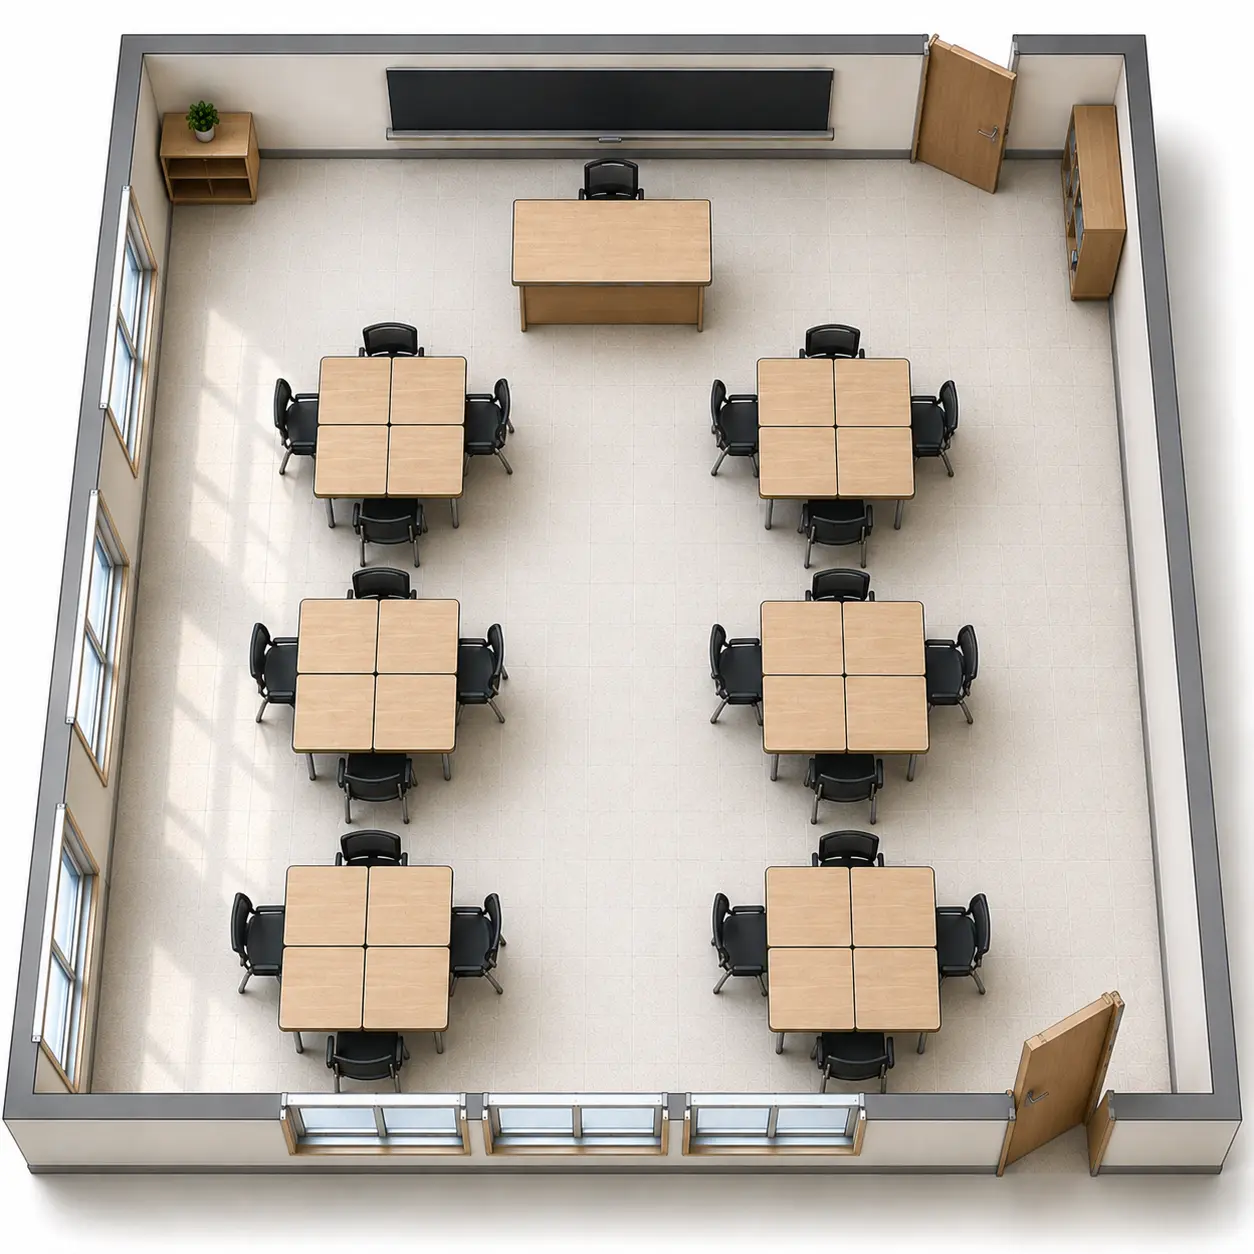
- Best for: Group projects, collaborative learning, and team activities
- Main advantage: Encourages face-to-face collaboration
- Keep in mind: Larger clusters can reduce walking space
Collaborative Classroom Layouts
Putting students into groups sounds simple enough until you try to fit everything into the room. Four desks might work perfectly for one class and leave another feeling cramped. The difference often comes down to spacing, walkways, and how easily the teacher can move around.
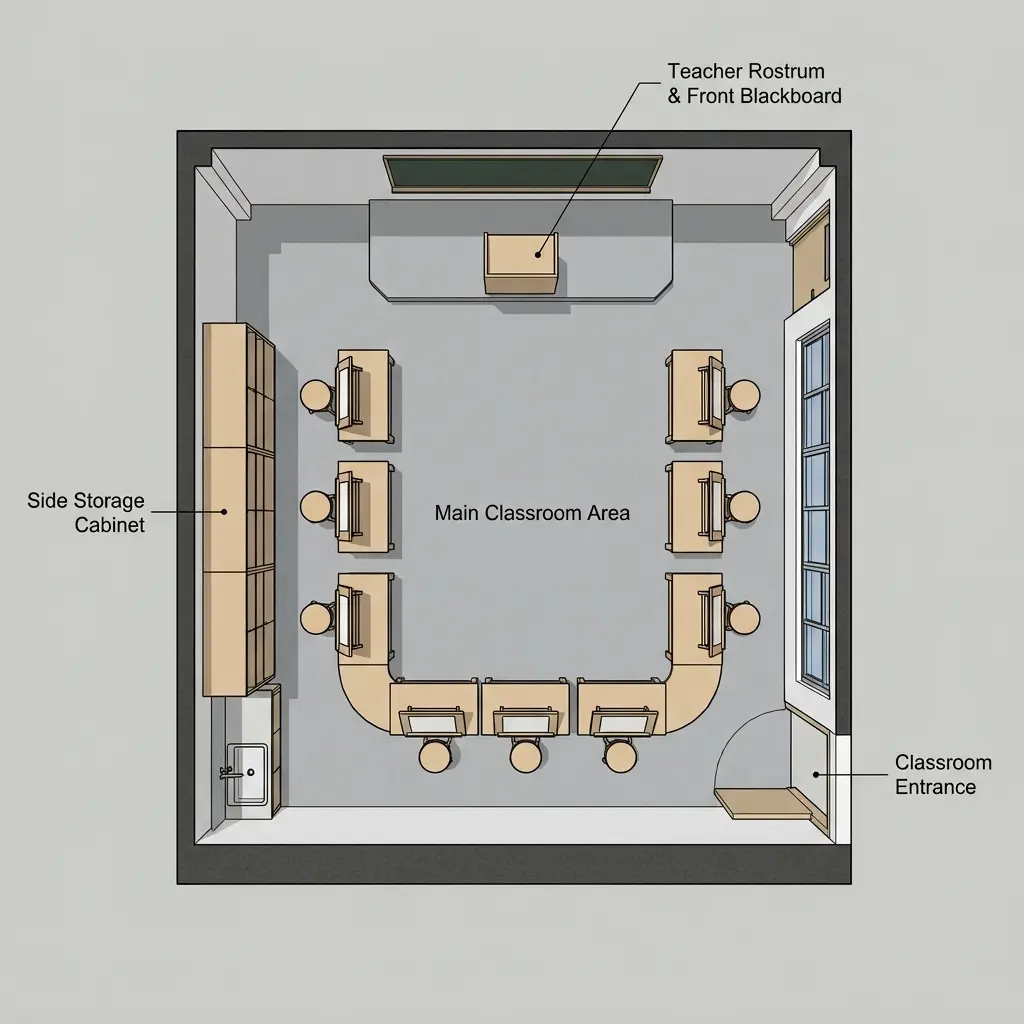
U-Shaped Classroom Layout
The open space in the middle is what makes this arrangement stand out. It gives the teacher room to move and keeps students within each other's line of sight, which can make discussions and demonstrations feel more natural.
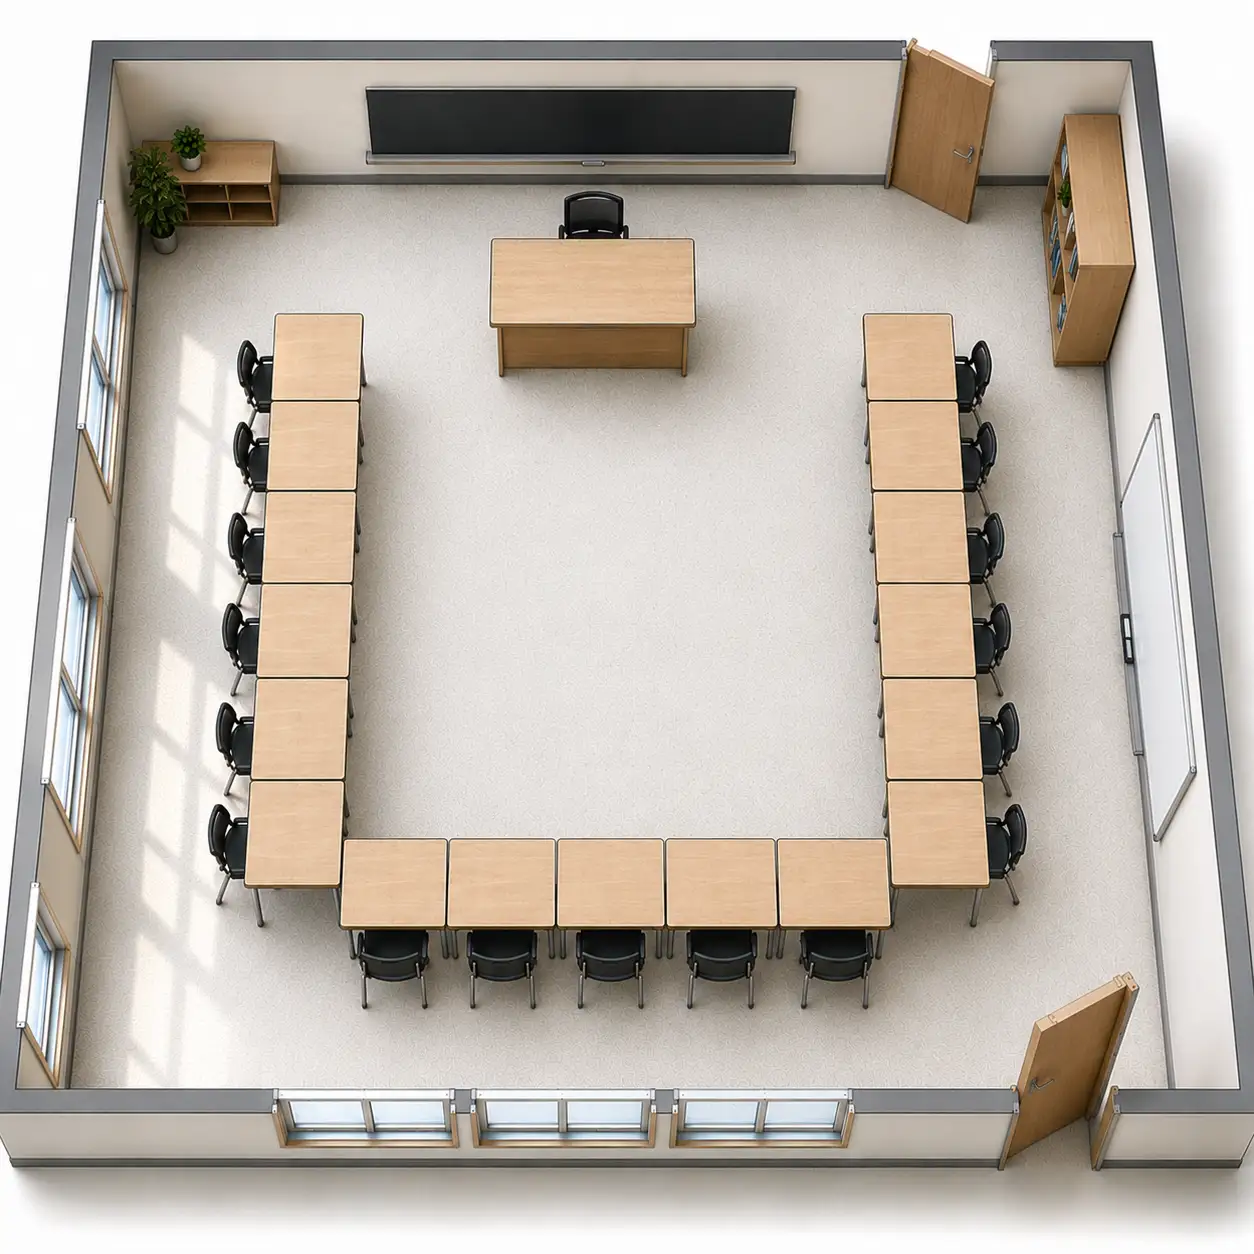
- Best for: Class discussions, presentations, demonstrations, and teacher-led activities
- Main advantage: Keeps the teacher and students within easy view of one another
- Keep in mind: Requires more floor space than rows
Horseshoe Classroom Layout
A horseshoe setup leaves the middle open while keeping the desks connected around the outside. It feels more open than a standard front-facing arrangement without completely giving up the structure of individual workspaces.
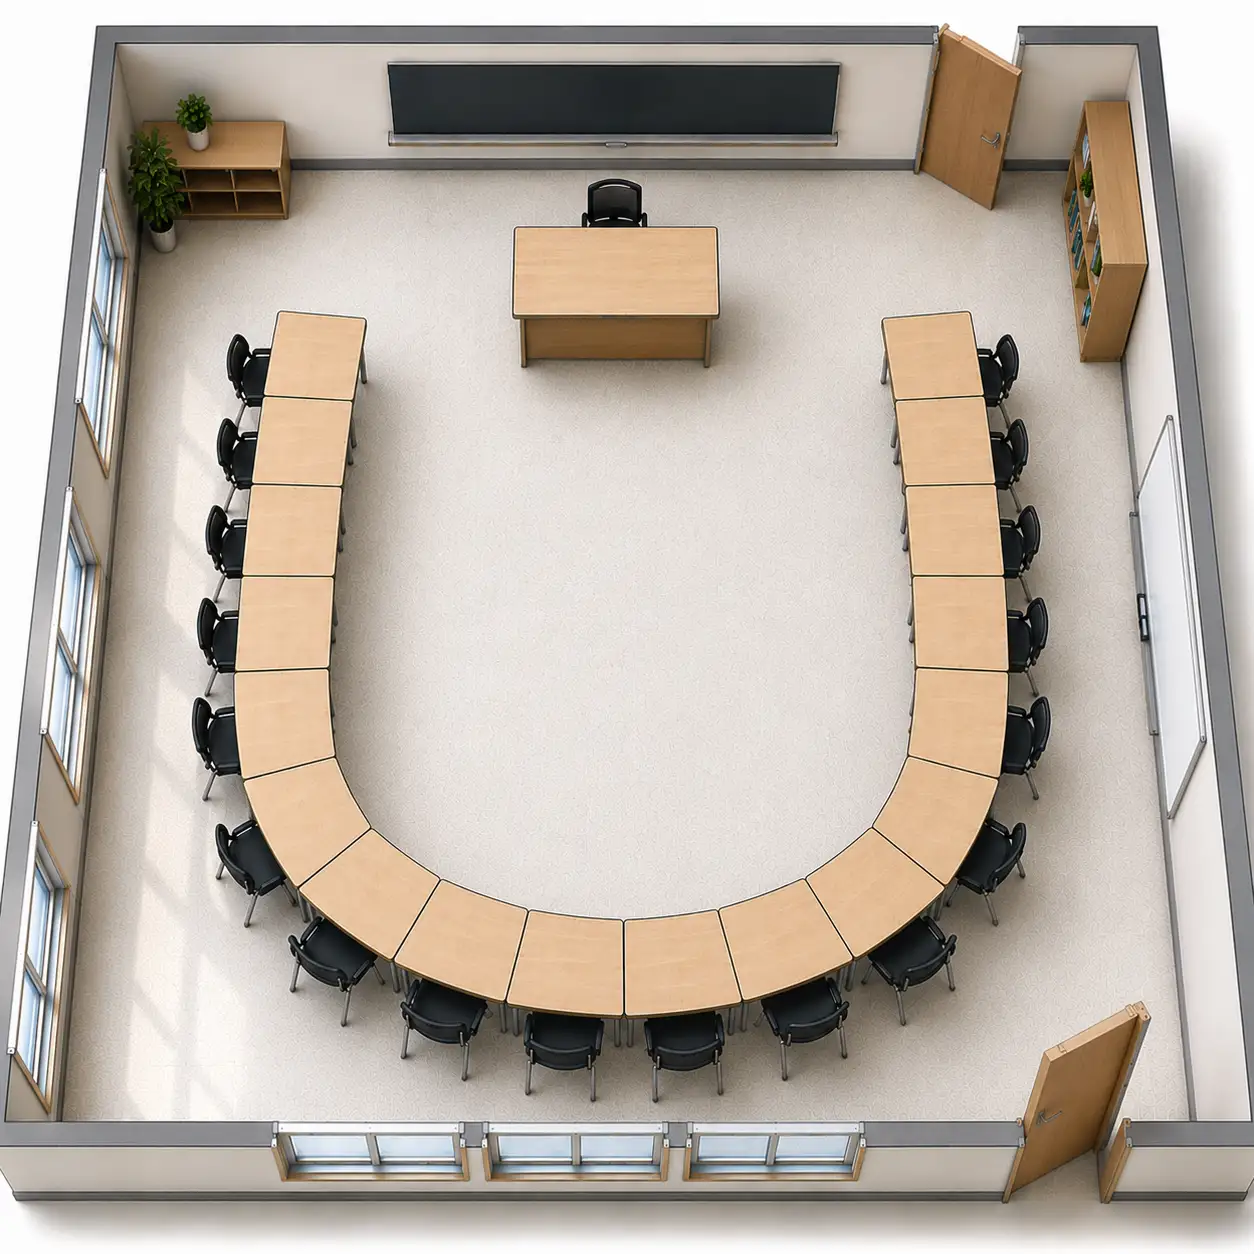
- Best for: Discussions, presentations, demonstrations, and interactive lessons
- Main advantage: Combines an open center with a structured seating arrangement
- Keep in mind: Works best when there is enough space around the outer edges
Circle Classroom Layout
There's no obvious front in a circle, so students naturally face one another rather than looking mainly toward the teacher. That makes the arrangement particularly useful when the conversation itself is the focus of the lesson.
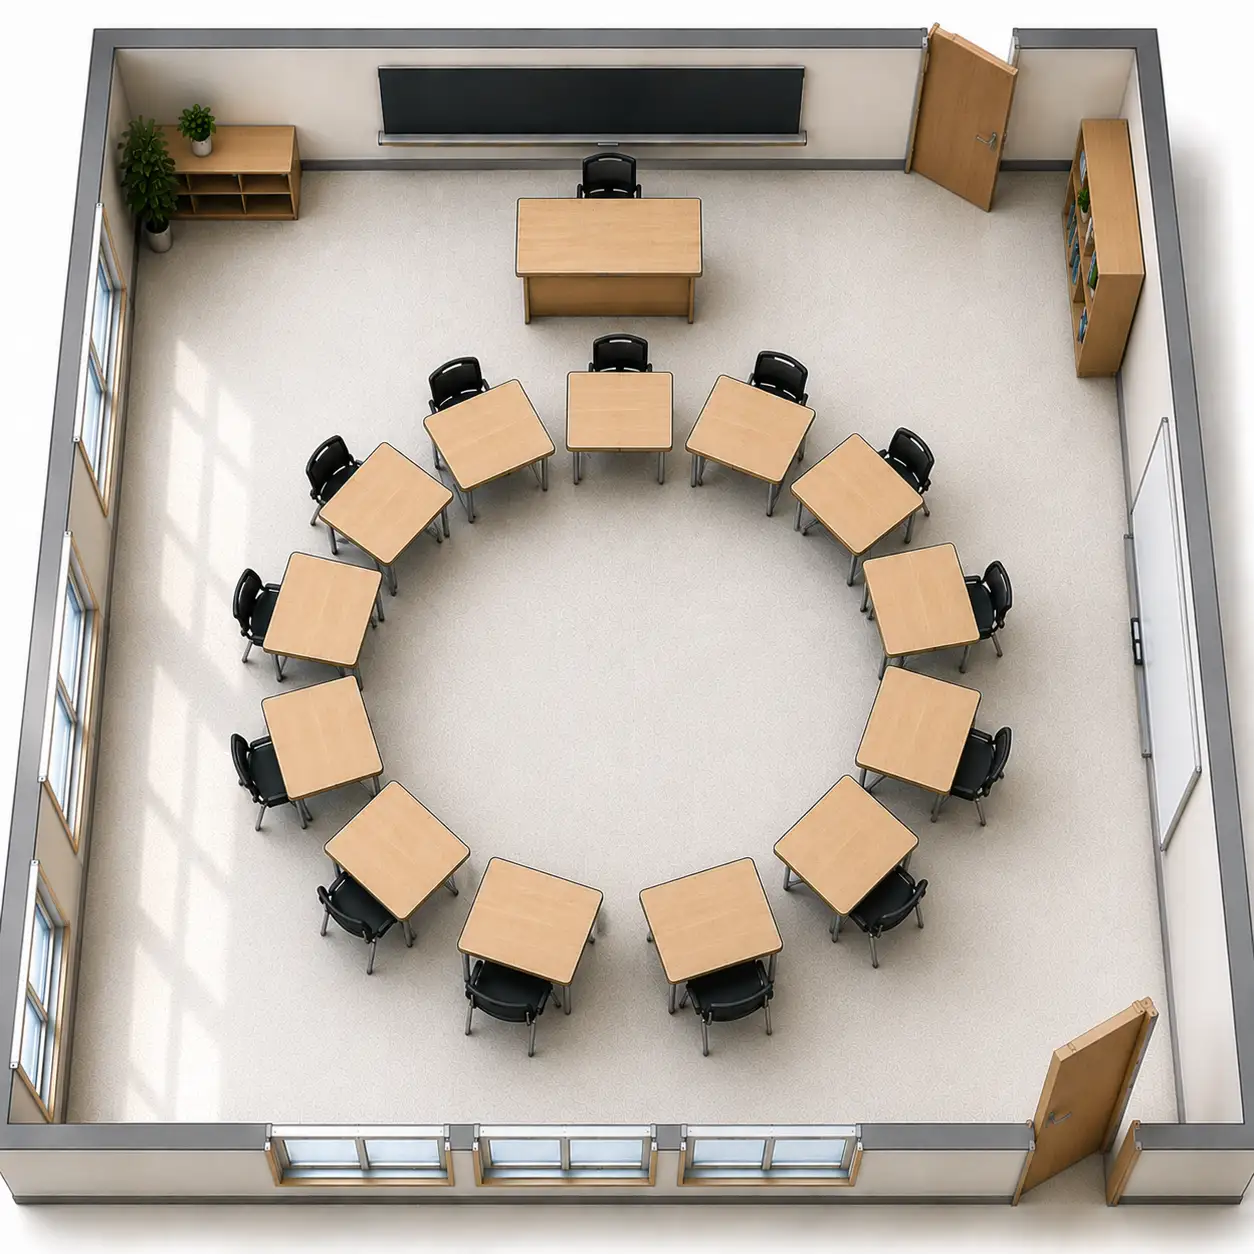
- Best for: Group discussions, seminars, class meetings, and sharing activities
- Main advantage: Encourages face-to-face participation
- Keep in mind: Less practical for lessons that rely heavily on a board or screen
Group Pods Classroom Layout
Instead of one large seating arrangement, the room is divided into several smaller work areas. Each pod gives students a place to collaborate, share materials, and work on a project without having to rearrange the entire classroom.
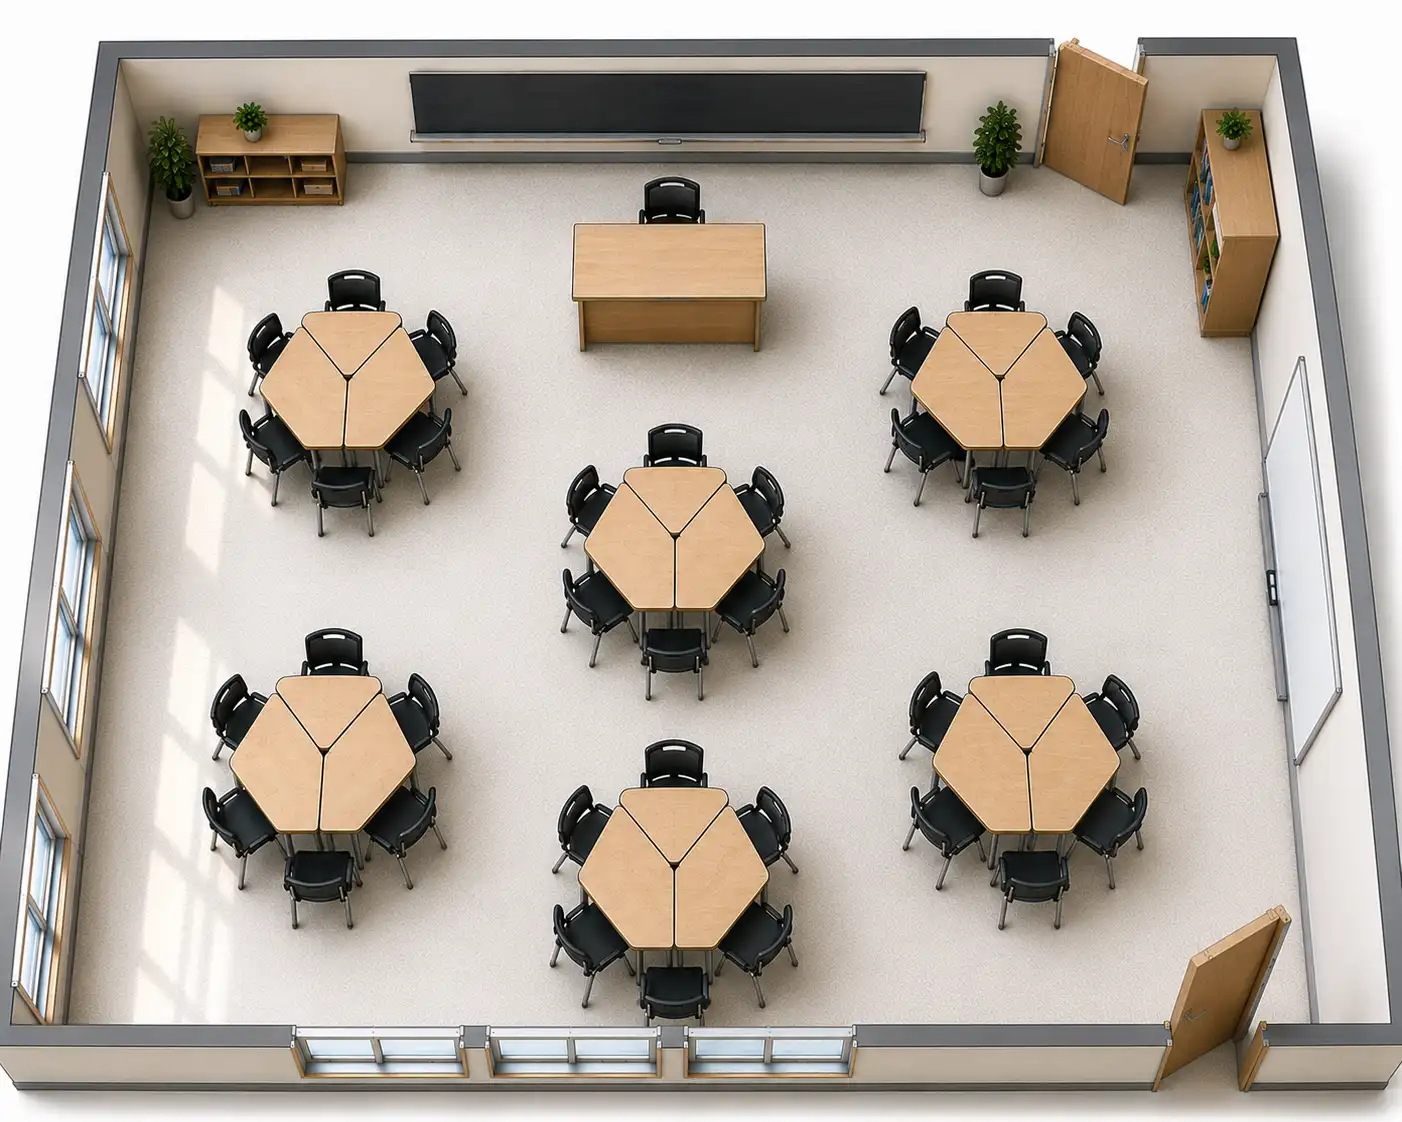
- Best for: Group projects, teamwork, collaborative learning, and hands-on activities
- Main advantage: Gives each group its own defined workspace
- Keep in mind: Leave enough space between pods for students and teachers to move around
Flexible & Activity-Based Classroom Layouts
A flexible classroom isn't just an empty room with movable desks.
The useful part is being able to change one part of the space without throwing the whole room into chaos.
A reading corner can stay quiet, tables can come together for a project, and an open area can be left available when students need to move.
Learning Stations Classroom Layout
Learning stations give different activities their own place in the room instead of making every student follow the same setup. One area might be for reading, another for hands-on work, while a central table is used for teacher-led activities or group tasks.
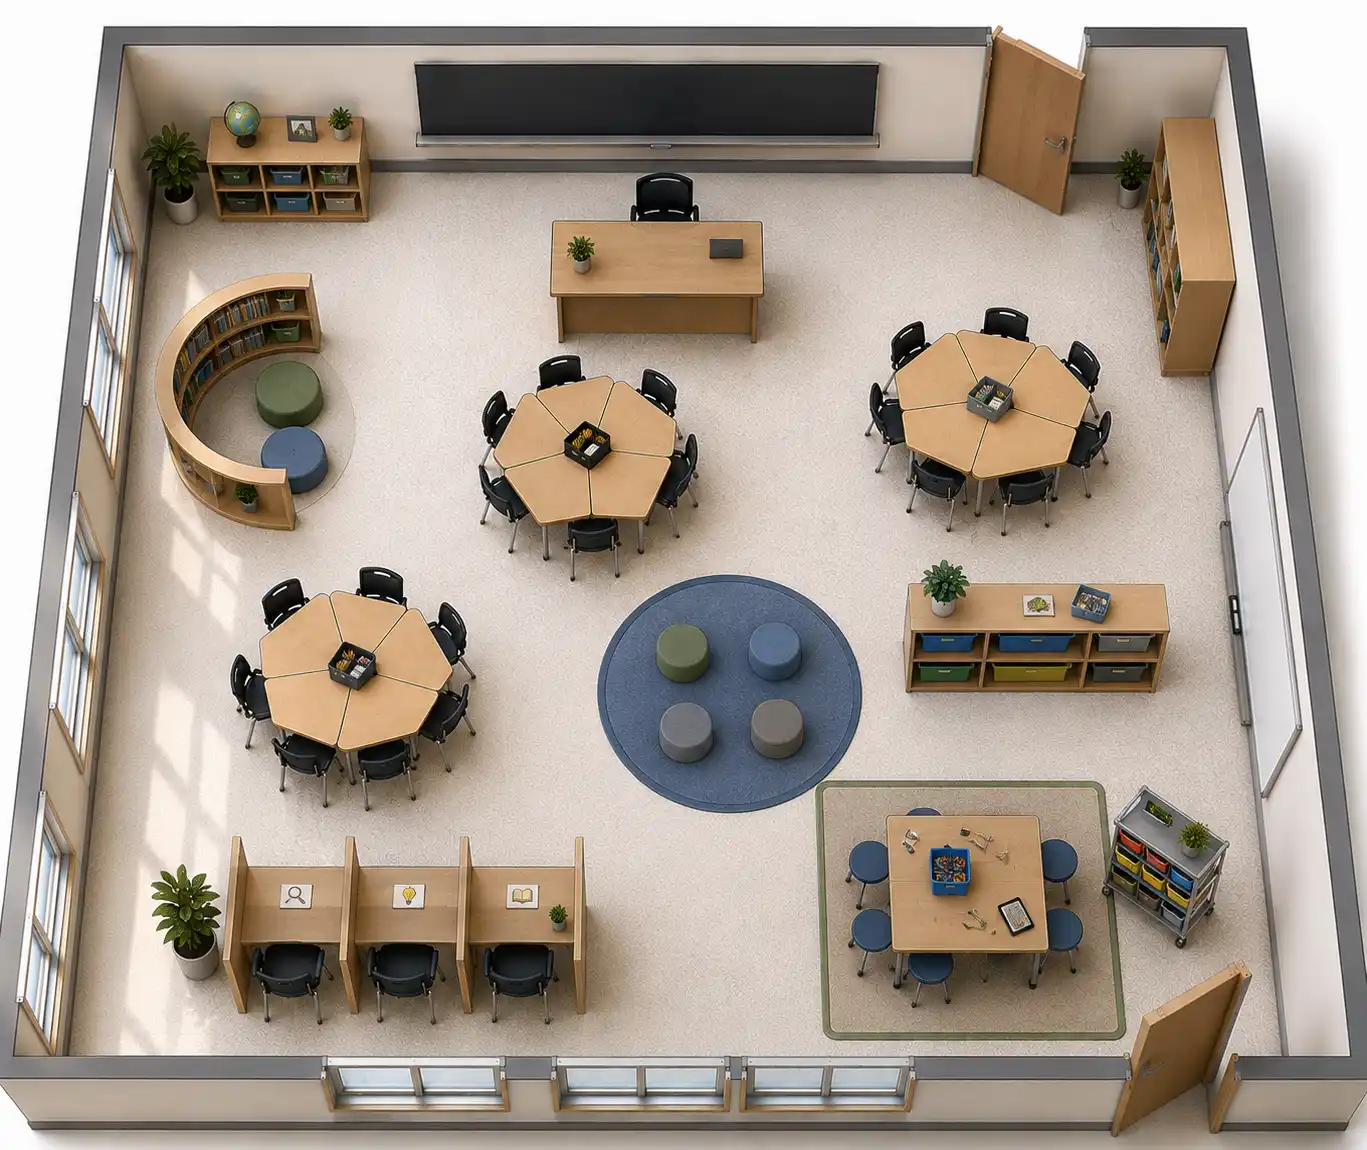
- Best for: Rotating activities, hands-on learning, and mixed-ability classes
- Main advantage: Keeps different activities organized in separate areas
- Keep in mind: Plan the routes between stations so students can move without crossing through another activity
Flexible Seating Classroom Layout
The furniture is part of the layout here, not something that stays in one position. Students might work at a desk for one task, move to a shared table for another, or use a quieter corner when they need to concentrate.
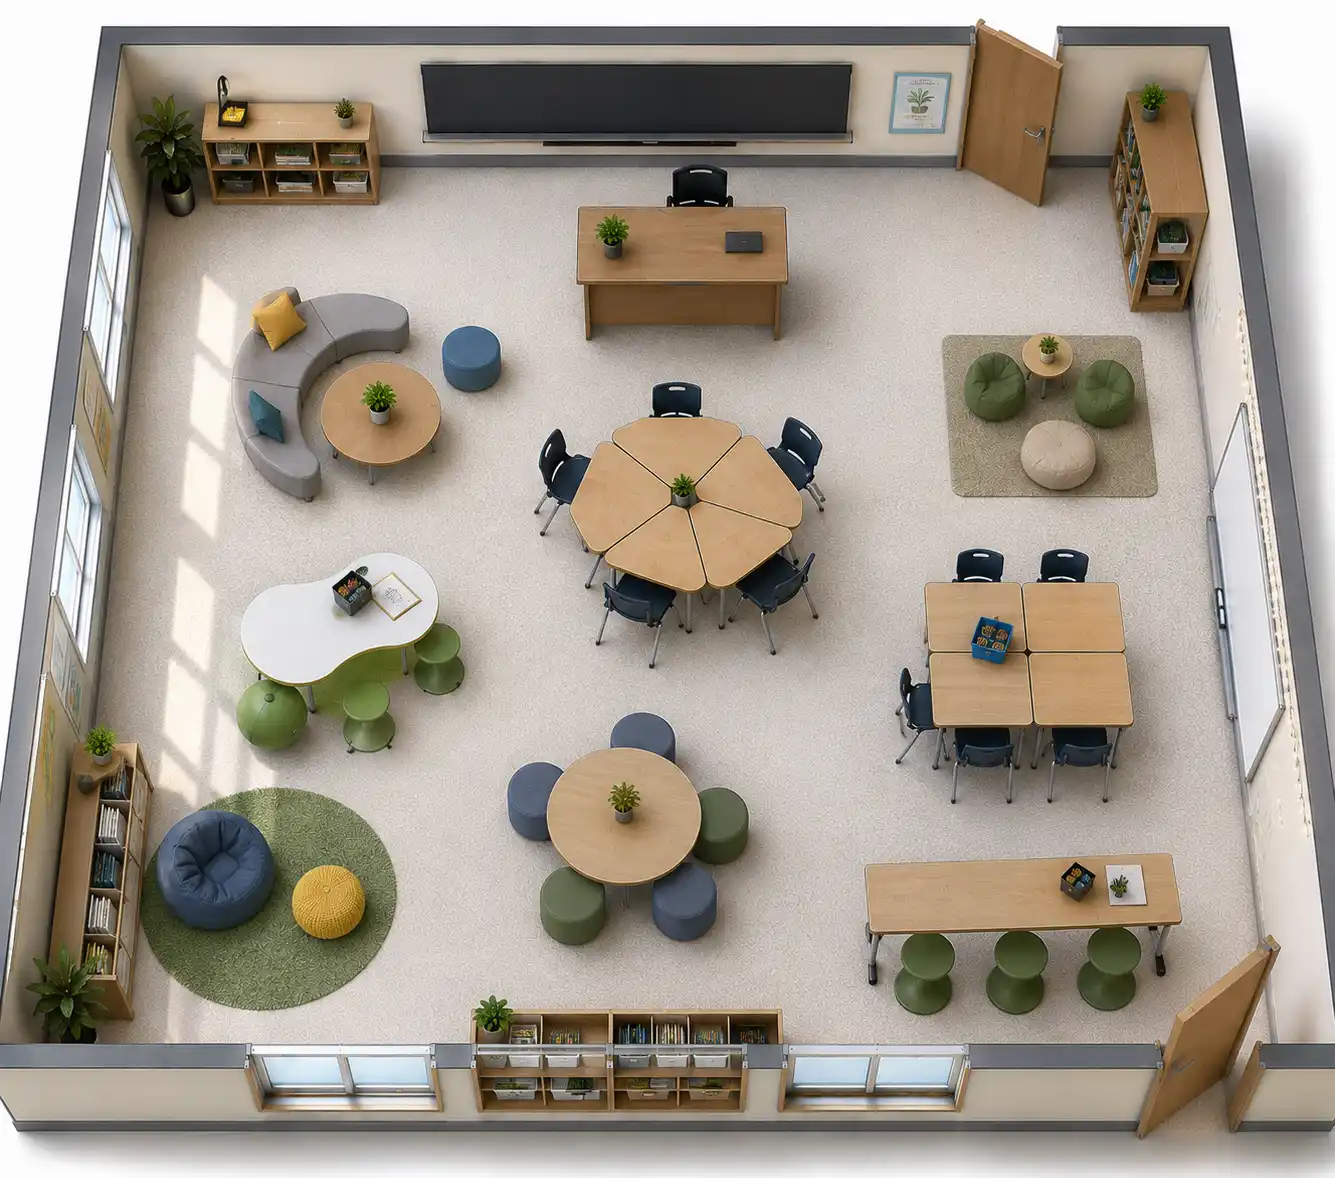
- Best for: Student choice, changing activities, and varied teaching styles
- Main advantage: Makes it easier to adapt the room as activities change
- Keep in mind: Keep enough open space for furniture to be moved without blocking walkways
Open Classroom Layout
When you remove some of the fixed desk arrangement, the empty floor becomes useful space rather than wasted space. It can accommodate movement, presentations, floor activities, temporary seating, or whatever the lesson needs that day.
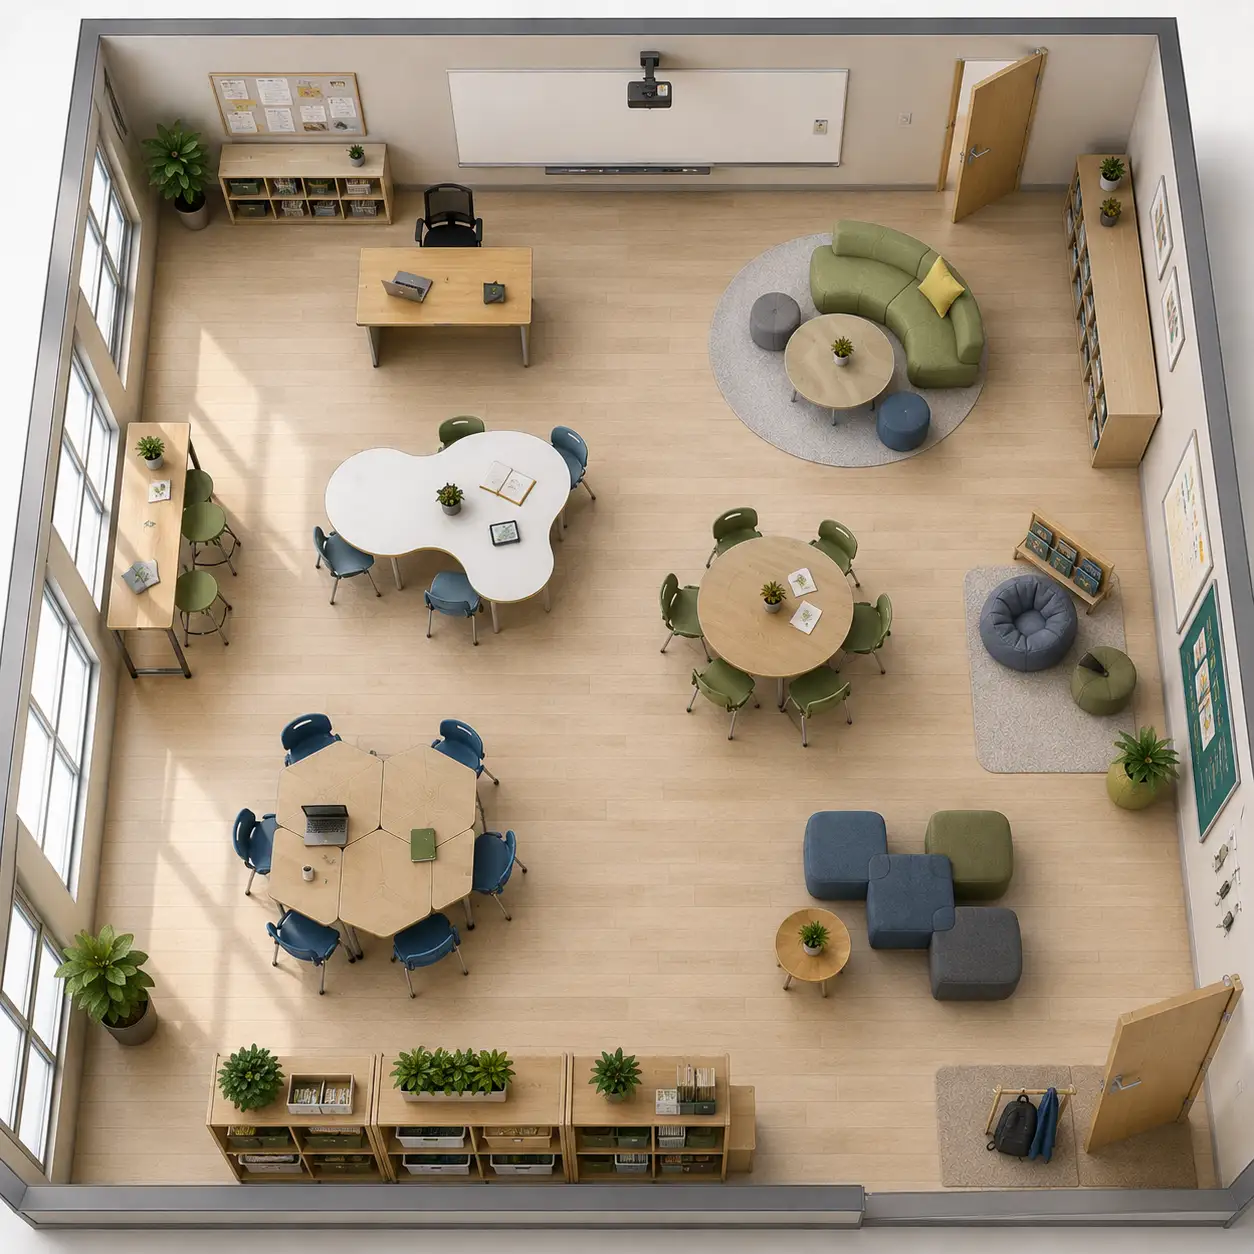
- Best for: Movement-based activities, presentations, play, and flexible teaching
- Main advantage: Creates more usable open space
- Keep in mind: Storage needs to be planned carefully so the extra space doesn't quickly turn into clutter.
Classroom Layout Ideas for Different Age Groups
A classroom for five-year-olds has very different demands from one for teenagers.
You may need room for floor activities, low storage, quiet corners, or clearly separated learning areas—and those details can take up more space than the desks themselves.
Preschool Classroom Layout
For preschoolers, the floor is often just as important as the tables and chairs. There needs to be enough room for play, group activities, movement, and low-level storage without making the classroom difficult for children to navigate.
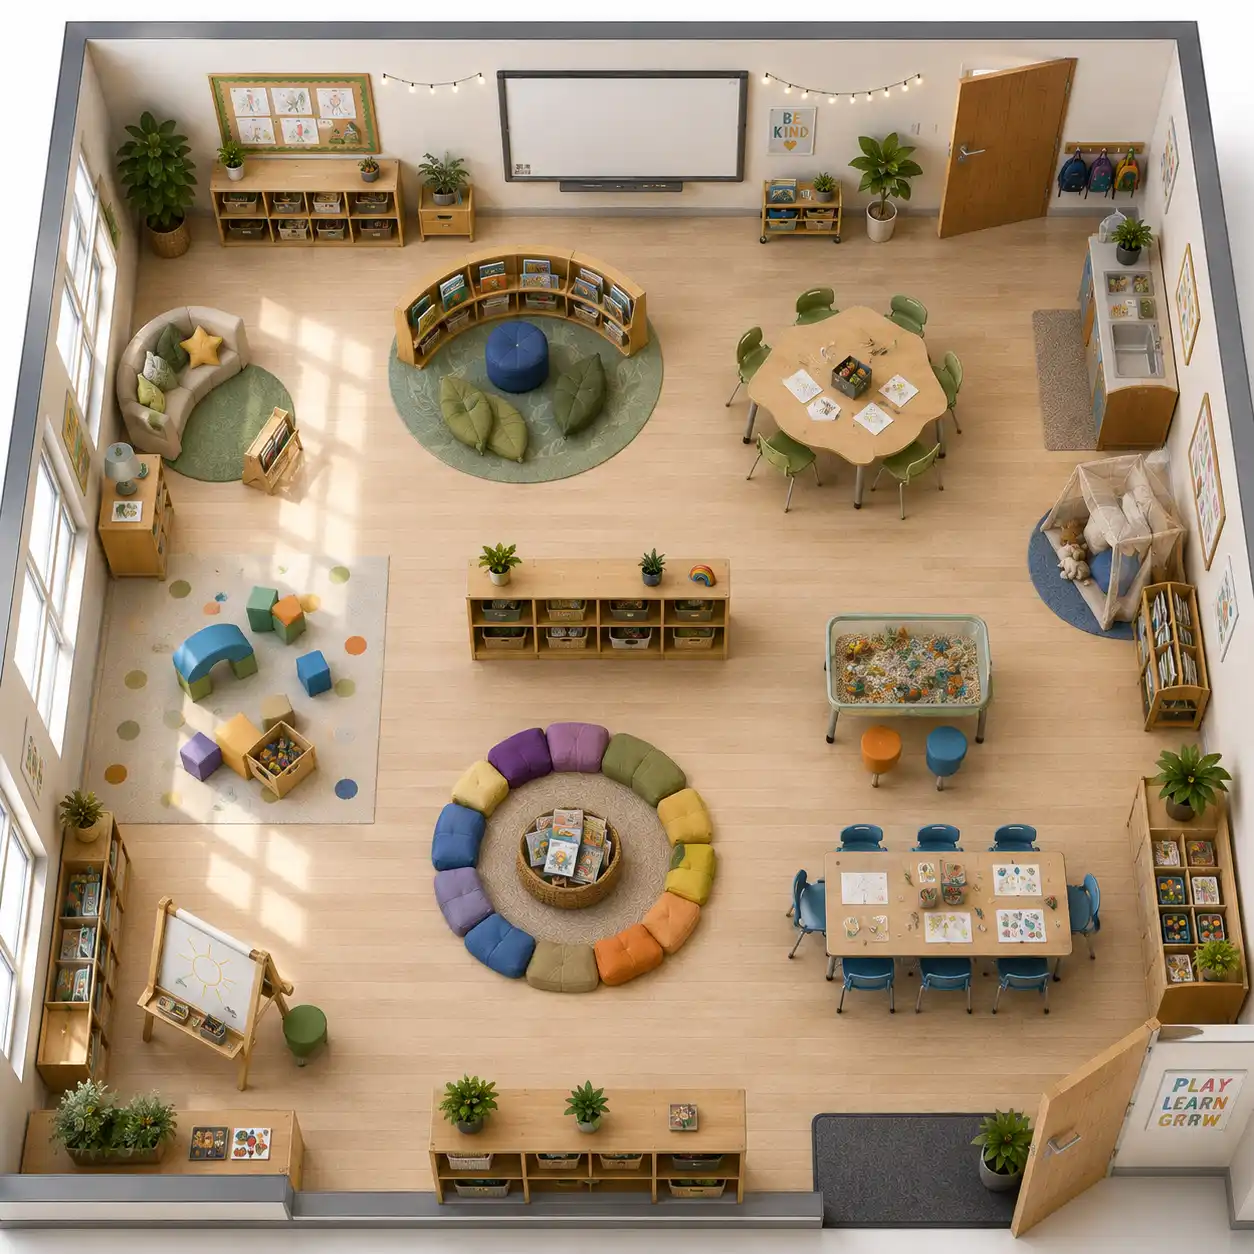
- Best for: Play-based learning, group activities, art, and movement
- Main advantage: Leaves room for both active and quiet activities
- Keep in mind: Keep furniture low and walkways open so children can move around safely
Nursery Classroom Layout
TA nursery classroom needs to support a different rhythm, with space for play, rest, care routines, and quieter activities. Keeping these areas easy to reach but not directly in the middle of the busiest part of the room can make the space much easier to manage.
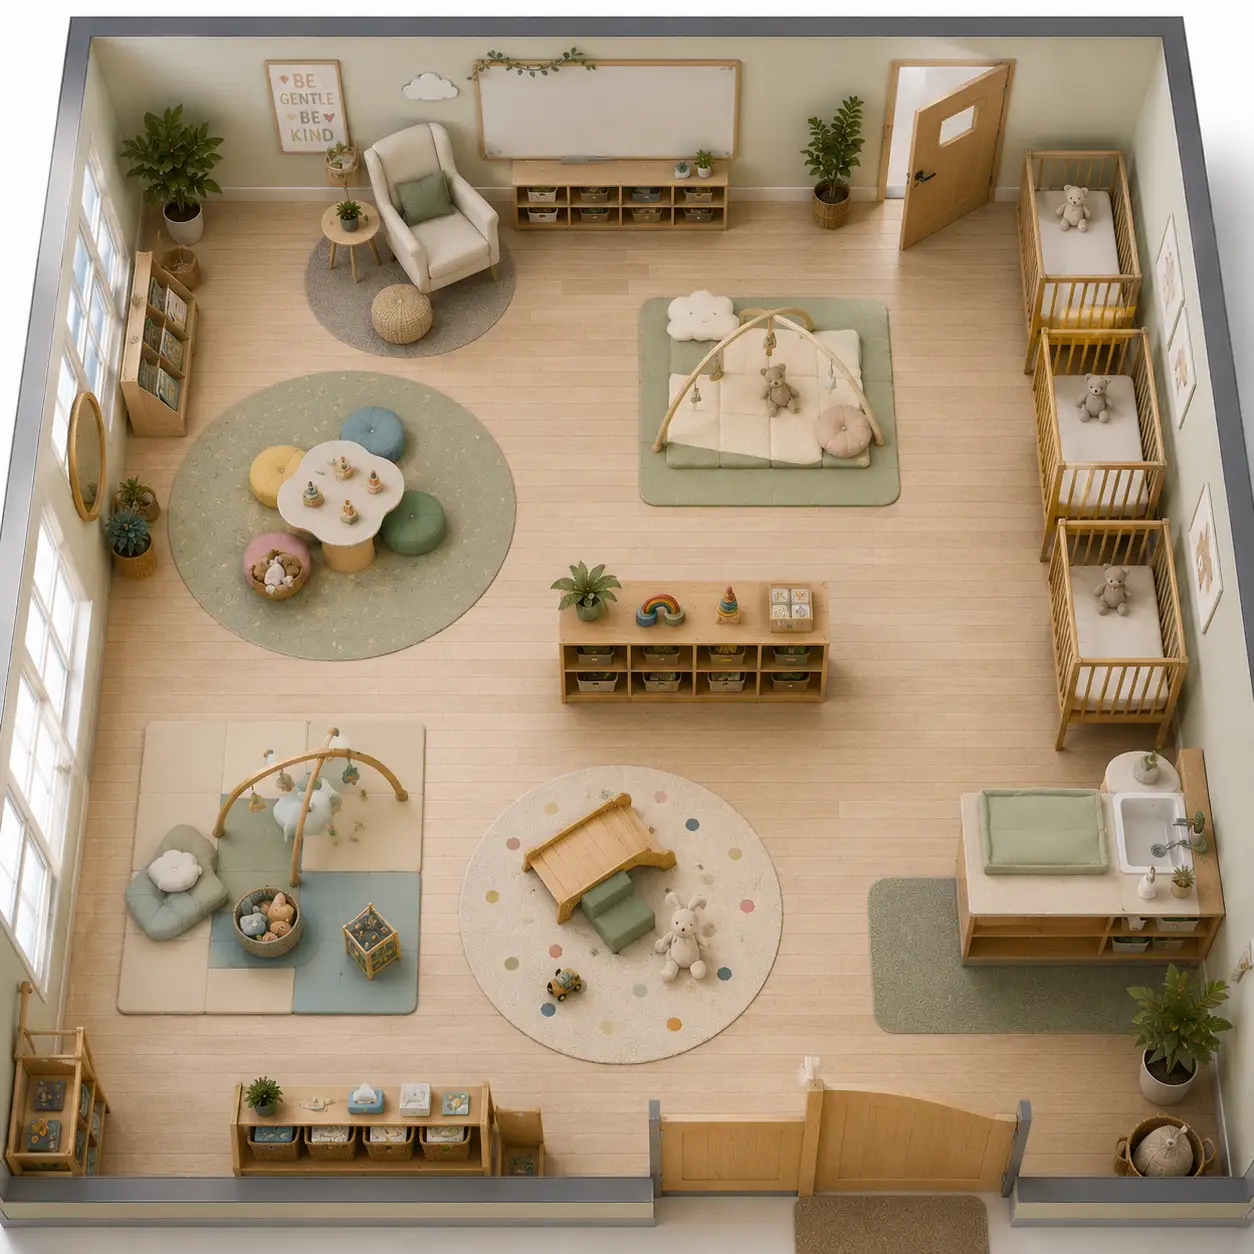
- Best for: Early childhood care, free play, rest, and simple activities
- Main advantage: Separates active and quiet areas within the same room
- Keep in mind: Leave clear paths between activity, storage, and care areas
Montessori Classroom Layout
A Montessori classroom is less about rows of desks and more about how children move through and use the space. Materials are typically kept accessible, with defined areas for different types of independent work rather than one central seating arrangement.
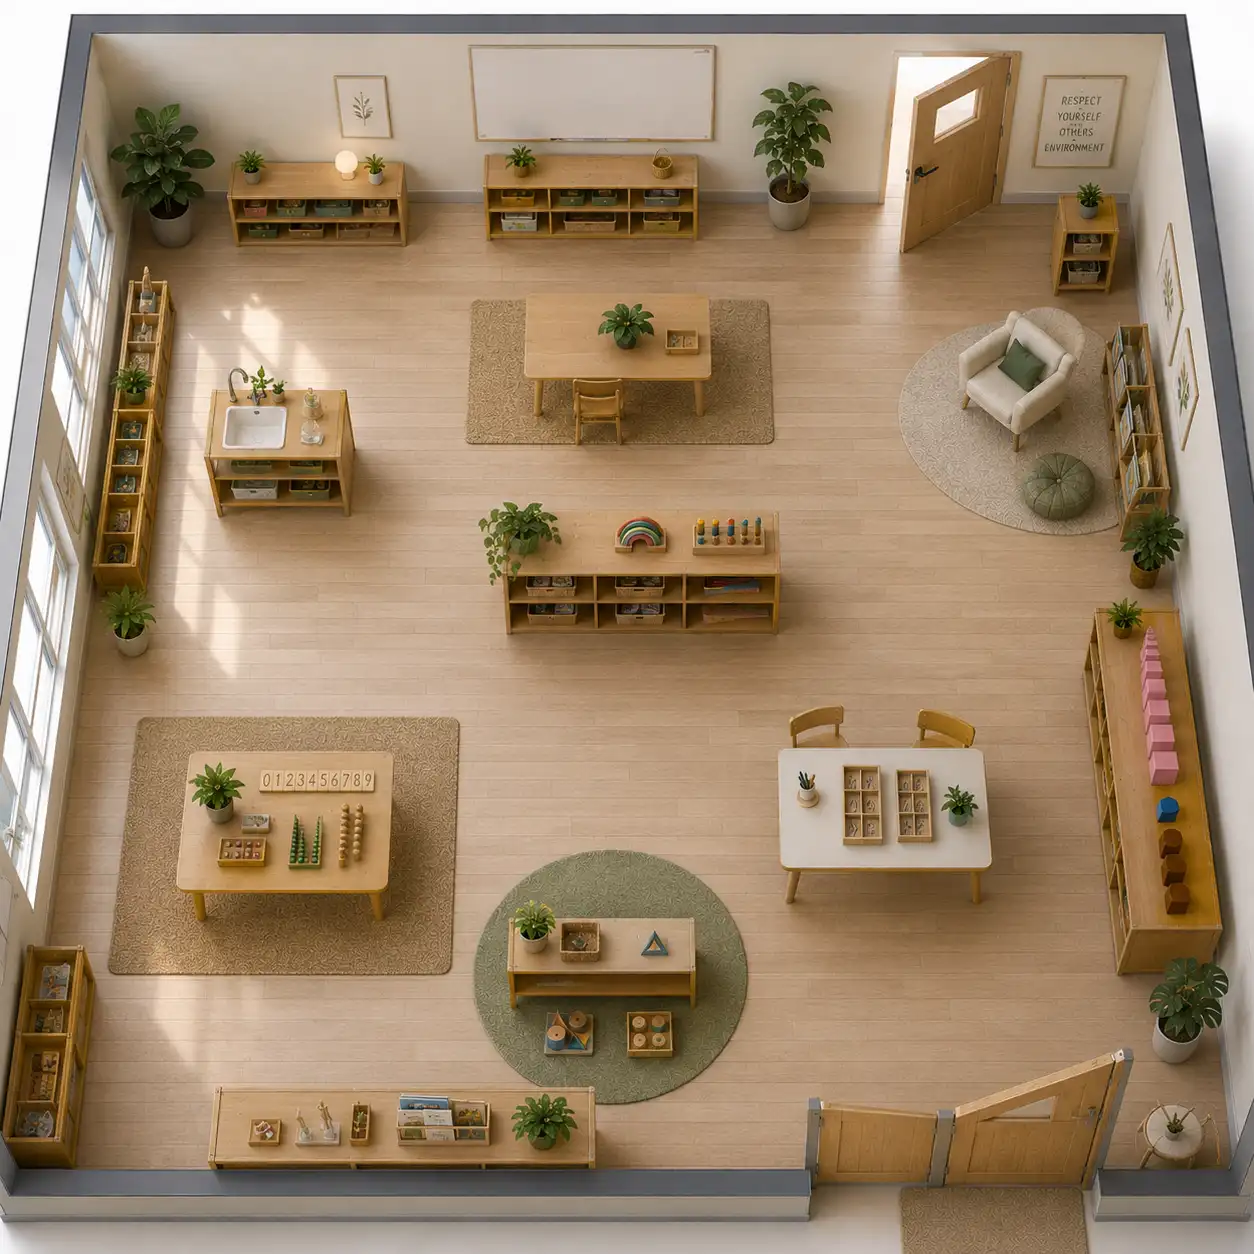
- Best for: Independent learning, self-directed activities, and hands-on work
- Main advantage: Supports freedom of movement and independent choice
- Keep in mind: Avoid overcrowding the room with furniture or learning materials
How to Choose and Plan Your Classroom Layout
Seeing different classroom layouts is a good starting point, but the one that looks right in an example may not work in your actual room. Before buying desks or moving furniture around, it helps to test the layout with your classroom size, student capacity, doors, windows, and walkways.
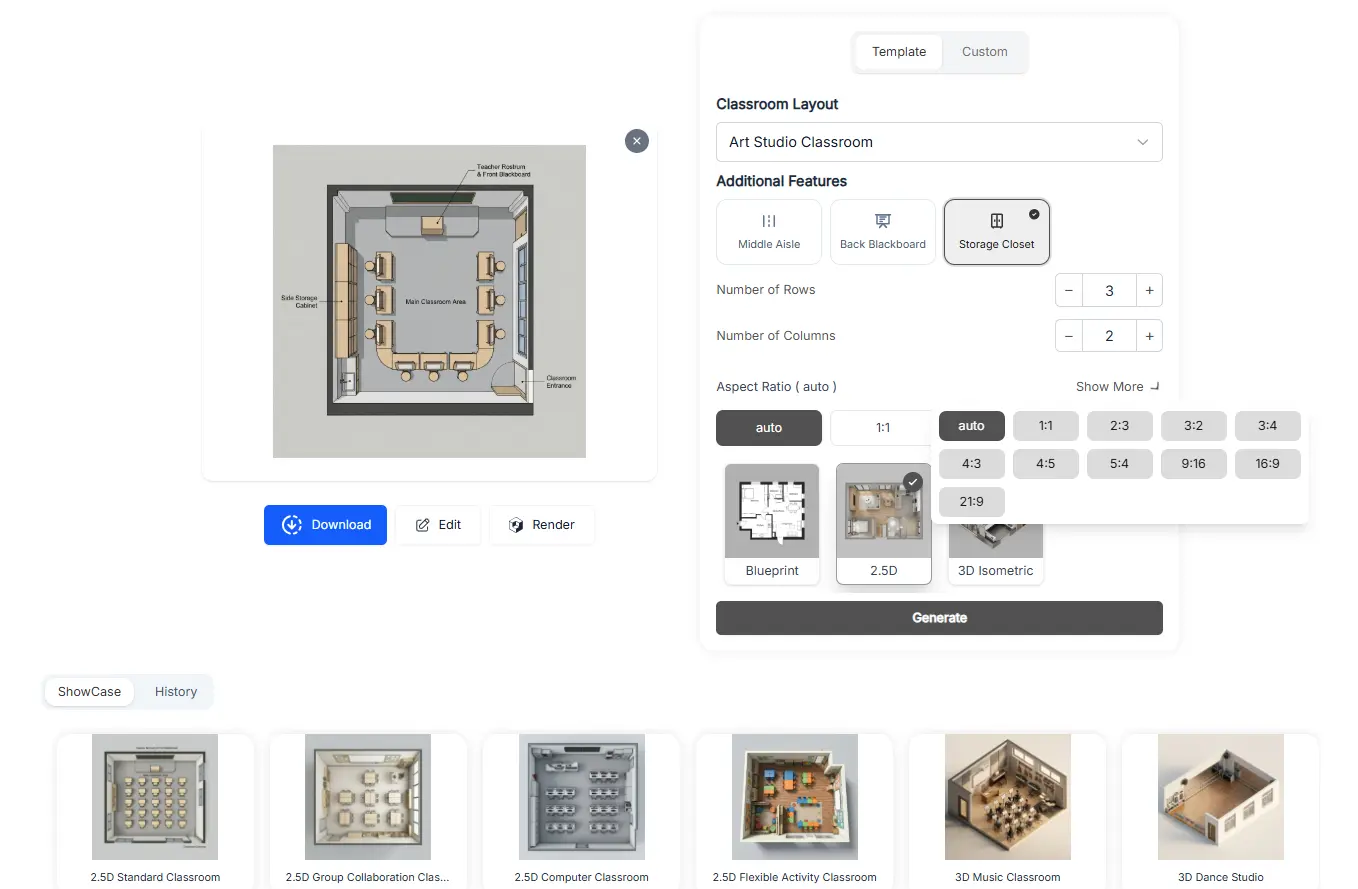
If you want to turn that idea into an actual floor plan, Floor Plan Maker's Classroom Layout Creator gives you two ways to start:
Start with a Pre-Made Classroom Layout
Choose a ready-made layout and adjust it to fit your classroom. You can set the area and dimensions of the space, then change the desk arrangement and other elements as needed.
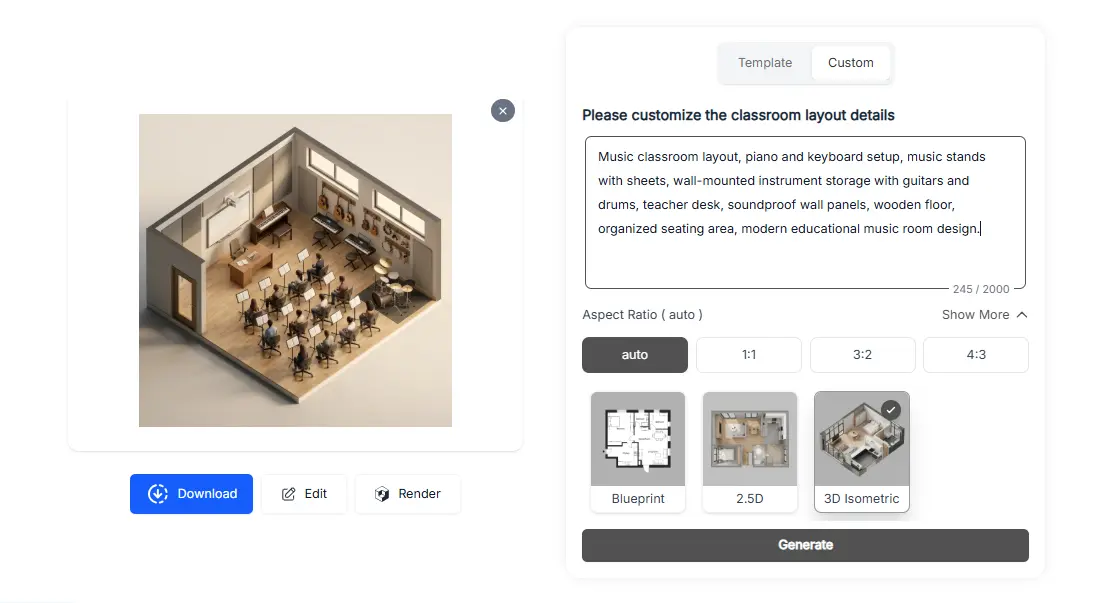
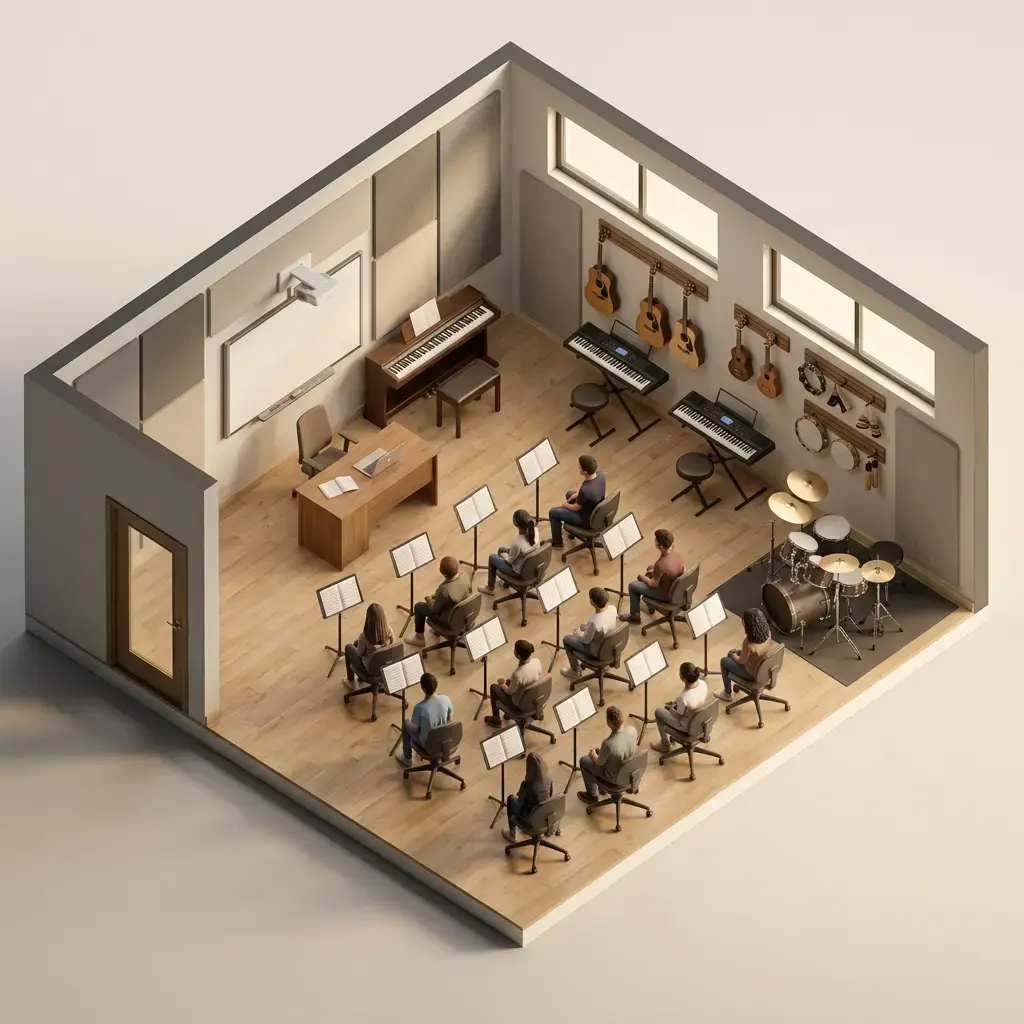
Create a Custom Classroom Layout with Prompts
Already have something specific in mind? Describe your requirements in a prompt, such as the number of students, desk arrangement, activity areas, or other layout preferences, and create a classroom plan around them.
Why Plan It Before You Buy?
Already have something specific in mind? Describe your requirements in a prompt, such as the number of students, desk arrangement, activity areas, or other layout preferences, and create a classroom plan around them.
- Test different layouts first — Compare rows, groups, U-shapes, or other arrangements without physically moving furniture.
- Avoid unnecessary purchases — Find out how many desks and tables your room can realistically accommodate before ordering.
- PCheck circulation — Make sure students and teachers have enough room to move between desks and activity areas.
- Adjust as your needs change — Try a different arrangement when class size or teaching activities change.
See how your classroom layout works in your actual space—before moving a single desk.
Try Free Classroom Floor Plan Generator